Well, I reckon y’all lookin’ to build one o’ them BBQ smokers outta bricks. Ain’t that somethin’! It ain’t as hard as folks might make it out to be, but there’s a few things y’all need to know if you wanna do it right. First off, ya gotta get yourself some bricks. Not just any bricks, mind you—ya want fire bricks for the inside. Regular bricks’ll work for the outside, but if you want it to last and keep that heat in, fire bricks is the way to go. They hold the heat better than the regular ones, and they won’t crumble like the cheap stuff will when it gets hot. But, don’t worry, I’m gonna walk you through it, step by step, just like I would if you was sittin’ here beside me with a cold drink in hand.
Now, to start, you’ll need a good spot in the yard or wherever ya want to put that smoker. Make sure the ground is flat, ‘cause you don’t want no wobbly smoker. If the ground ain’t even, you’ll need to lay down a little bit of gravel or something to make it sturdy. Once you got that sorted, it’s time to gather your materials. You gonna need fire bricks for the inside, some regular bricks for the outside, and some mortar. I reckon you could just use the regular stuff, but ya best be gettin’ yourself a high-heat resistant mortar if you wanna do it right. There’s some brands out there like Sakrete that’ll do the job for ya. Don’t skimp on that stuff—it’s important!


Startin’ the Build
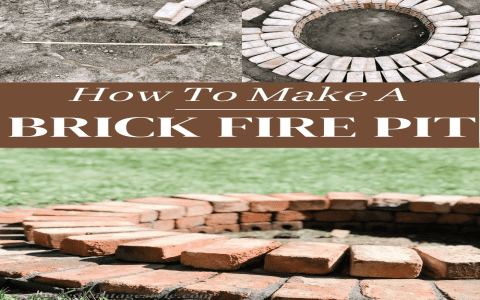
So, once ya got all your stuff ready, it’s time to get to work. Start by layin’ down your first layer of bricks. You can just stack ’em on top o’ each other like you would with any ol’ wall, but you want to make sure the first layer is nice and level. If it ain’t, everything else is gonna be off. You’ll want to make sure there’s a little gap between each brick to allow the mortar to hold ‘em together good. Now, don’t go crazy with the mortar. You don’t need a whole mess of it, just enough to stick the bricks together nice and firm.
Once you’ve got your first layer laid down and the mortar has had time to set, it’s time to start on the next one. Keep on stackin’ the bricks, makin’ sure each layer is level and straight. It’s just like makin’ a brick wall, really. But you gotta be careful with the inside, ‘cause that’s where the fire is gonna go. You want the inside of that smoker to be tight and solid. Keep addin’ layers until you got the height you want for your smoker.
Building the Firebox
Now, the firebox is the part where you’ll be puttin’ all your charcoal or wood to make the smoke. This part needs to be nice and solid, ‘cause that’s where the heat’s gonna get the hottest. You don’t want no flimsy walls there! When you start building the firebox, make sure to leave an opening for the smoke to flow into the cooking chamber. The size of that opening depends on how big you want your smoker to be. The bigger the opening, the more heat and smoke will get in, so be mindful of that.
When you buildin’ up the walls of the firebox, be sure to use those fire bricks inside and regular bricks on the outside. You can stack ‘em just like the rest of the smoker, but remember to leave a little space between ‘em for the mortar to stick. Now, once you got the firebox built up, you’ll need a chimney to let the smoke escape. The chimney’s gotta be up high so the smoke can flow out nice and easy.
Setting Up the Cooking Chamber
Alright, now that you got the firebox set up, it’s time to work on the cooking chamber. This is where you’ll be puttin’ your meat to cook. You want the inside of that chamber to be as solid as the firebox, so keep stackin’ them fire bricks inside. The walls need to be thick to hold that heat in and make sure the smoke circulates around your food good. You can make the chamber as big or small as you want, just keep in mind that a bigger smoker needs a bigger firebox to keep it hot enough.


Once you’ve got the walls and chimney built, you can add a door to the front of your smoker. This door’s gotta be tight, so make sure it fits real snug. If there’s gaps, the heat and smoke’ll escape, and that ain’t no good. You can use a piece of metal or a thick piece of wood for the door, but make sure it’s sturdy. If you want to get fancy, you can put a handle on it so you can open and close it easy.
Finishing Touches
Now that your smoker’s built and the firebox is all ready, it’s time to finish things up. You can smooth over any rough spots with a little bit of extra mortar and make sure everything is sealed up tight. Once it’s all dry and hard, you can start using it! Just build a small fire in the firebox, let it heat up slow, and you’ll be smokin’ your meat in no time.
Remember, it takes time to get a good smoker goin’, but once it’s up and runnin’, you won’t regret it. You can smoke ribs, chicken, or whatever your heart desires. Just make sure you keep an eye on the temperature, and don’t rush it. Low and slow—that’s the key to good smoked meat. Now go ahead, get yourself some bricks, and start buildin’ that BBQ smoker! Y’all’ll be cookin’ like a pro in no time.
Tags:[bbq smoker, DIY smoker, brick barbecue, firebrick, smoker construction, homemade smoker, outdoor cooking, DIY BBQ, smoker tips]


