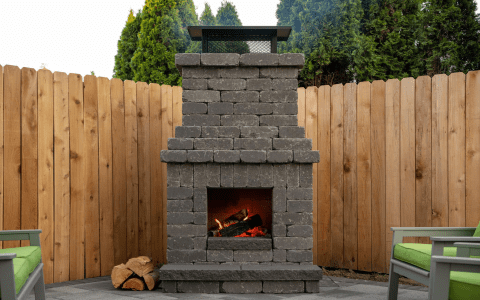
Hey everyone, it’s your boy back with another DIY project. This time, I decided to get my hands dirty and build something that’s both functional and looks pretty darn good in the backyard – a brick barbecue grill. Yeah, you heard that right. I’m talking about the kind you see and think, “Wow, I wish I had one of those.” Well, guess what? Now you can, and I’m gonna walk you through how I did it.
First things first, I needed a plan. I’m no architect, so I kept it simple. I sketched out a basic rectangular design on a piece of paper, nothing fancy. The most important part was figuring out the size of the grill set I wanted to use. I had one lying around that was about 700mm x 400mm, so I used that as my starting point. I built the walls around that measurement. The size is pretty important.


Getting the Materials
Next up, materials. I went to the local hardware store and picked up a bunch of regular bricks. Now, I read online that some folks use special firebricks, but honestly, regular ones worked just fine for me. The key, I found out, is in the mortar. I made sure to get a high-heat resistant mortar – Sakrete is a brand that was recommended, and it did the trick. You don’t want your grill falling apart after a few uses, right?
- Regular bricks: Plenty of them. I got extra because I always mess up a few.
- High-heat resistant mortar: This is crucial. Don’t cheap out on this one.
- Grill set: Mine was 700mm x 400mm, but you do you.
- Basic tools: Trowel, level, measuring tape, the usual suspects.
Building the Base
I started by laying a concrete base. You want this thing to be stable, so a solid foundation is a must. I mixed some concrete, poured it into a makeshift frame I built out of some old wood, and let it set. This took a couple of days, but patience is a virtue, especially when you’re dealing with concrete. I built this base according to the size of the grill.
Laying the Bricks
Once the base was solid, it was time to lay some bricks. I started with the bottom layer, applying a generous amount of that high-heat mortar. I used a level to make sure everything was, well, level. This part is a bit like LEGOs, but way heavier and messier. I built up the walls, leaving a space at the front for the grill set and another space at the bottom for the charcoal. It’s important to leave gaps between some bricks for airflow – fire needs to breathe, you know?
Adding the Grill Set
After the walls were high enough, I placed my grill set on top of the supports I built into the walls. It fit perfectly. I continued building around it, securing it in place. At this point, it really started to look like a barbecue grill. I was pretty stoked, not gonna lie.
Finishing Touches
I let the whole thing dry for a few days. I know, I know, more waiting. But you don’t want to rush this. After it was all set, I fired it up for a test run. I threw some charcoal in the bottom, lit it up, and waited for those beautiful embers. Once it was ready, I slapped a couple of burgers on the grill. The result? Perfection. The burgers cooked evenly, and they had that awesome smoky flavor that you only get from a real grill. I built it around my grill set, I think it’s great.
So there you have it. That’s how I built my own brick barbecue grill. It wasn’t super easy, but it wasn’t rocket science either. If I can do it, anyone can. Plus, it’s a great conversation starter at parties. “Oh this old thing? Yeah, I built it myself.” I built it successfully and it was awesome. Trust me, the satisfaction you get from grilling on something you built with your own two hands is unbeatable. Give it a shot, and let me know how it turns out!


