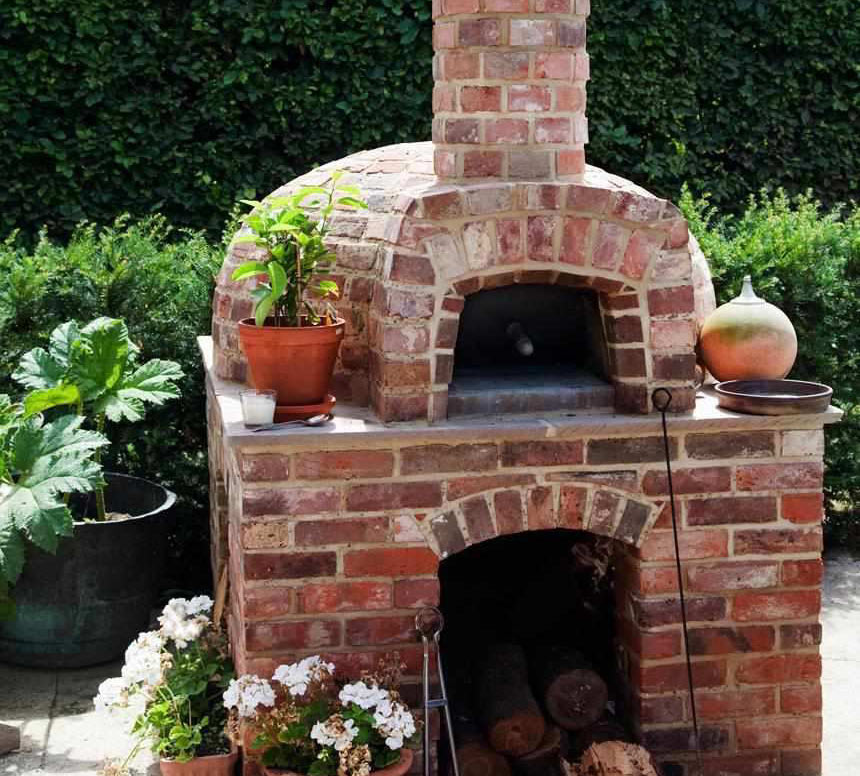
Okay, guys, let’s talk about my latest project – building an outdoor brick oven. I’ve always wanted one of these in my backyard, and this summer, I finally decided to take the plunge and made it happen.
First things first, I had to figure out where to put this thing. I mean, it’s not exactly a small undertaking. After pacing around my yard for a good while, I settled on a nice little corner spot that gets a good amount of sun.


Prepping the Foundation
- Digging and Leveling: Started by digging out the area. It was a bit of a workout, let me tell you. Once I had a decent-sized hole, I made sure the ground was level. I used a leveler, nothing fancy.
- Gravel Base: Then, I threw in a layer of gravel. I stomped it down real good to make sure it was packed in tight. This is supposed to help with drainage and stability.
- Concrete Pour: Next up was the concrete. I mixed it up in a wheelbarrow – I felt like a real construction worker at this point. Poured it over the gravel, smoothed it out, and then let it set. This took a couple of days, and honestly, the waiting was the hardest part.
Building the Base
With the foundation ready, I started on the base of the oven. I decided to use regular bricks for this part, since they’re cheaper and this section wouldn’t be in direct contact with the fire.
- Laying Bricks: I laid the bricks in a simple rectangular shape, mortaring them together. It took some time to get the hang of this, to be honest. My first few rows were a little wonky, but I got better as I went along.
- Creating the Oven Floor: For the floor of the oven where the fire would actually be, I used fire bricks. They are more expensive, yeah, but you don’t want regular bricks cracking on you when things heat up. I laid these out carefully, making sure they were nice and level.
Constructing the Dome
This was the most challenging part of the whole project, but also the most satisfying. I mean, you can’t have an oven without a dome, right?
- Building a Form: I made a form out of sand and wet newspaper. It looked like a big, lumpy igloo. This was to support the bricks while I was building the dome shape.
- Laying the Dome Bricks: Starting from the base, I began laying fire bricks in a circular pattern, slowly working my way up and inwards. This was a slow and careful process. Each brick had to be placed just right to create the dome shape.
- The Archway: Leaving an opening for the oven door, I built an archway using a wooden frame as a temporary support. This was tricky, but I managed to get it done.
- Finishing Touches: After letting the mortar dry for a good while, I carefully removed the sand form inside. I mean if you want an oven to cook, there must be a place to do so, right? And boom, there it was, my very own brick oven dome. I added a chimney using some more fire bricks, and then covered the whole thing with a layer of insulation and a final coat of mortar for protection.
The whole thing took me about a few weeks of on-and-off work. But man, was it worth it! The first time I fired it up and cooked a pizza in there, I felt like a king. The pizza came out amazing, with that perfect crispy crust you can only get from a wood-fired oven. I’ve also baked bread, roasted vegetables, and even slow-cooked some ribs. My friends thought I was crazy when I started this project, but now they’re all begging to come over for pizza night. It’s become the centerpiece of my backyard, and I couldn’t be happier with how it turned out. If you’re thinking about building one yourself, I say go for it! It’s a lot of work, but it’s definitely a rewarding experience. The cost? Yeah, it was not cheap. Let’s say it was somewhere in the mid-range of what I found online, probably around $5,000, give or take. But honestly, I’d do it all over again in a heartbeat.


