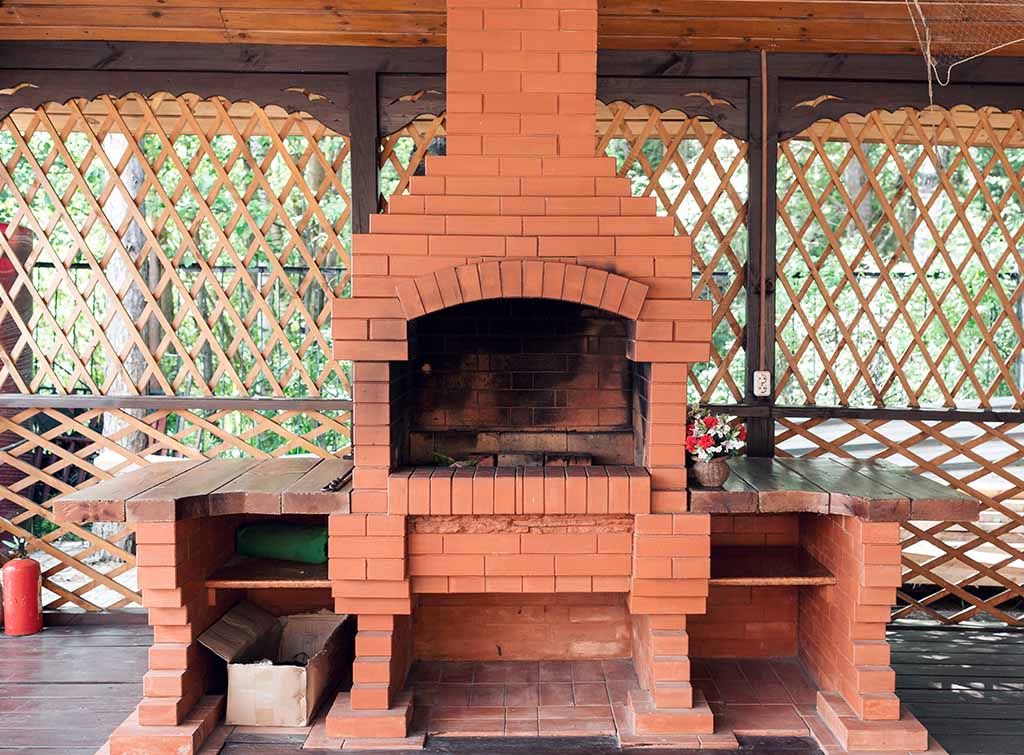
So, I’ve always wanted a proper brick BBQ grill in my backyard. You know, the kind you see in those home improvement shows that make everything look so easy? Well, I finally decided to take the plunge and build one myself. Let me tell you, it was quite the adventure, but totally worth it in the end.
First things first, I had to figure out what I was getting myself into. I did some digging online and found out that I could use regular bricks, which was a relief. But the trick was to use a special kind of mortar – one that could handle the heat. Apparently, there’s this stuff called high-heat resistant mortar, and Sakrete makes a good one. I also learned that the design I had in mind was based on standard clay bricks, you know, the 230mm long, 110mm wide, and 76mm deep ones. And with a 10mm mortar joint, I figured I’d need at least 156 bricks, plus some extras for cutting.


Once I had a basic idea, I started gathering my materials. I went to the local hardware store and loaded up on bricks, that special mortar, and some other supplies like a trowel, level, and a few other bits and pieces. It was a bit of a workout just getting everything home, but hey, who needs a gym when you’ve got a DIY project, right?
The next step was the actual building. I started by laying out the foundation, making sure everything was level and square. This part was crucial, because a wonky foundation means a wonky grill, and nobody wants that. I used some string and stakes to mark out the area, and then I started mixing the mortar. Let me tell you, mixing mortar is more tiring than it looks! But I got it done, and I started laying the first course of bricks.
- Laying the foundation: Marked the area, mixed the mortar, and placed the first bricks.
- Building up: Layer by layer, I added bricks, making sure to stagger the joints for stability.
- Cutting bricks: Some bricks needed to be cut in half or three-quarters to fit. Used a chisel and hammer for this.
Layer by layer, I built up the walls of the grill. I made sure to stagger the joints, like I read online, to make the structure stronger. I also had to cut some bricks in half or three-quarters to make them fit. I used a chisel and a hammer for this, and let’s just say it wasn’t as easy as those YouTube videos make it look. But I managed, and slowly but surely, the grill started to take shape.
I took my time, making sure each brick was level and secure before moving on to the next one. It was a slow process, but I wanted to do it right. There were moments when I doubted myself, especially when I messed up and had to redo a section. But I kept at it, and eventually, the walls were done.
Finishing Touches
With the main structure complete, I added a few finishing touches. I built a shelf for the charcoal and a top for the cooking area. I even added some decorative bricks around the edges to give it a bit of a personal touch. It wasn’t perfect, but it was mine, and I was proud of it.
Finally, the day came when I could fire it up for the first time. I loaded it up with charcoal, lit it up, and waited for it to heat up. The first thing I grilled was some simple burgers and hot dogs, but they tasted amazing. Maybe it was the smoky flavor, or maybe it was just the satisfaction of cooking on something I built with my own hands.
So, there you have it – my journey of building an outdoor brick BBQ grill. It was a lot of work, a lot of sweat, and a few frustrating moments, but in the end, it was totally worth it. Now, every time I fire up that grill, I get a sense of accomplishment and a damn good meal. If you’re thinking about building your own, I say go for it! Just be prepared for a bit of a challenge, and remember to enjoy the process.


