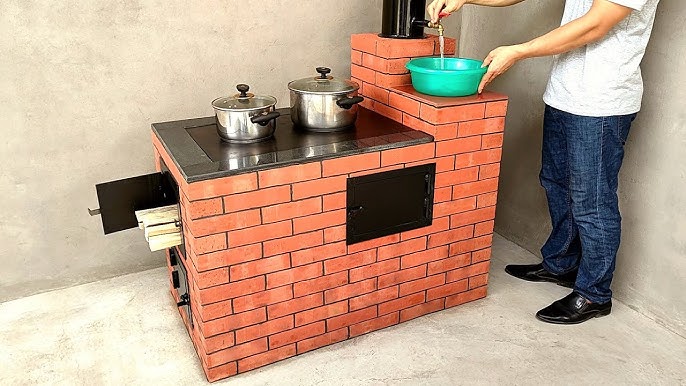
Okay, let’s get started. I spent the whole day building a brick cooker in my backyard. You won’t believe how this turned out.
Idea comes up
It all started when I saw some cooking videos on the internet. There is a very interesting way to cook pizzas – a brick oven. The cooking speed is very fast and they said it’s very delicious. You know, I’m always into these kinds of things, so I immediately decided to make one myself. And I think I need to act fast before I lose my interest.


Planning
First thing first, I got to figure out what it’s going to look like. I don’t want it to be too big or too small. So I did some quick sketches on my notebook. It seemed good! Then, I started to think about where to put it. I picked a spot in my backyard that seemed perfect, close to the wall and flat.
Getting the stuff together
Then, I ran to the local hardware store to buy bricks, some cement, and other tools I might need. The guy at the store was super helpful, he just helped me pick out everything I needed, and even gave me some tips on mixing cement.
Building it up
Back home, I started by laying out the bricks in the shape I wanted, like a trial run, just to make sure it all fit right. I mixed up the cement, following the advice from the hardware guy – not too wet, not too dry. Then I start to lay down the first layer of bricks. I was tapping each one into place, trying to keep them level and even. It was kind of tiring, but satisfying at the same time.
Keep working
I kept at it, row after row, slowly but surely building up the walls. My back was starting to ache, and my hands were covered in cement, but I was determined to see this through.
Finishing touches
After hours of work, the main structure was done. It was starting to look like a real oven! I added a little chimney at the top, just like the ones I saw online. That should help with the smoke, right?
The moment of truth
I let the whole thing dry for a while. I’m not sure how long it should be, so I just waited until the next day. Then, I couldn’t wait any longer. I started a small fire inside, just to test it out. I’d say it took me about one hour to preheat it. I put the pizza in. It’s just a frozen one from the supermarket. After 5 minutes, I took it out. And the pizza turned out great! Evenly cooked, and with a crispy crust. It’s so much better than cooking it in my oven at home!
In Conclusion
So, that’s how I built a brick oven in my backyard. It was a lot of work, but totally worth it. If you’re thinking about doing something like this, I’d say go for it! Just be prepared for some hard work, and make sure you have a good idea of what you’re doing.


