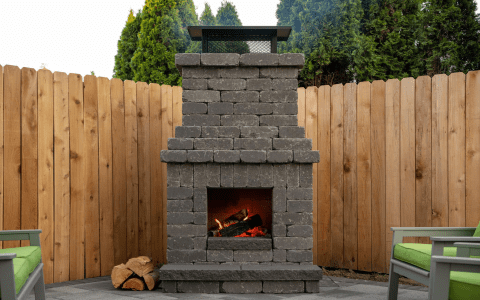
Okay, so, I wanted to build a grill outside, like, a permanent one, you know? I figured bricks would be the way to go because they’re tough and can handle the heat. Plus, they look kinda cool.
Getting Started
First thing, I had to figure out where to put this thing. I picked a spot in my backyard that was far enough from the house but still convenient. Then, I sketched out a basic design. Nothing fancy, just a simple box shape with a space for the coals and a grill on top. I grabbed some graph paper and started sketching. I tried many times and finalized the shape and size.


Gathering Supplies
Next, I made a list of what I needed:
- Bricks: I guessed I needed about 100-150 regular bricks.
- Mortar: I found some special mortar that’s made for high heat. It’s called Sakrete high heat resistant mortar.
- Grill set: This included a tray for the coals and a couple of grill grates.
- Tools: I already had some basic tools like a trowel, level, and measuring tape.
Laying the Foundation
I started by digging a shallow pit where the grill would sit. I made it a little bigger than the base of my grill design and filled it with gravel for drainage. I spent an afternoon on this. Then, I laid down the first layer of bricks, making sure they were level. I used the level after every brick and it made me crazy.
Building the Walls
Once the foundation was set, I started building up the walls. I mixed the mortar according to the instructions and started spreading it on the bricks. I laid the bricks in a staggered pattern, like you see in walls, to make it stronger. This part took forever, but I just kept at it, one brick at a time. I felt my lower back pain while keeping building the walls.
Adding the Grill
After a few layers, I left spaces for the coal tray to slide in. Then, I kept building until it was tall enough for the grill grates to sit on top. I made sure there was enough room between the coal tray and the grates for good airflow. I checked the web pages and made some modifications to my plan.
Finishing Touches
Once the walls were up, I let the mortar dry for a few days. I just made sure everything was looking good and sturdy. I wanted to make sure it wouldn’t fall apart when I started a fire in it. I waited for more than a week.
First Cookout
Finally, it was time to test it out! I put some coals in the tray, lit them up, and waited till they were nice and hot. Then, I threw some burgers and hot dogs on the grill. It worked perfectly! The heat was even, and the food cooked up great. The food was so yummy. I was so happy.
So, yeah, that’s how I built a brick grill. It was a lot of work, but totally worth it. Now I have a cool, custom grill that’ll last for years. And, hey, if I can do it, anyone can!


