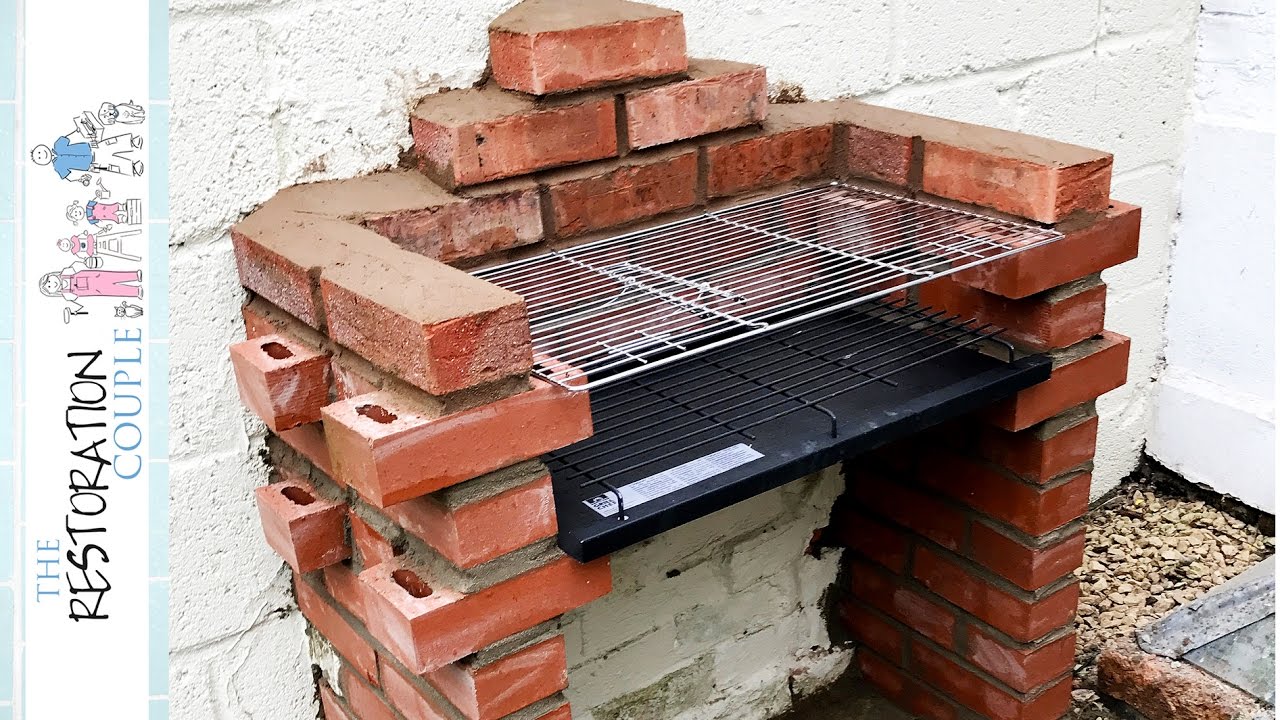
Okay, so I’ve always wanted a cool brick grill in my backyard, you know, for those summer barbecues and just to show off a little. I finally got around to building one, and let me tell you, it was a ride. I’m no brick-laying pro, but I managed to get it done. Here’s how the whole thing went down.
Getting Started
First, I had to figure out where this thing was going to go. I picked a spot that was far enough from the house, but still close to the patio where everyone hangs out. Once I had the location, I started marking out the area with some string and stakes. This was just to get a rough idea of the size.


Gathering Supplies
Next up, I made a trip to the local hardware store. I needed a ton of bricks, around 100-150 of them as I also want a prep table, I ended up getting 150 of them. Also bought some sand, and gravel. I also picked up a simple grilling set, one of those metal trays for the charcoal, and a couple of grill grates.
Digging and Prepping
With all the supplies ready, I started digging. I made a shallow pit, maybe about 6 inches deep, where the grill was going to sit. Then, I filled it with a layer of gravel for drainage, followed by a layer of sand to level things out. I used a tamper to really pack it down and make sure it was solid. I made a wood frame just in the right size.
Laying the Bricks
This was the tricky part. I mixed up the mortar according to the instructions on the bag. I started laying the bricks, one by one, following my string outline. I made sure to stagger the joints for strength, you know, like you see in brick walls. It was slow going, and my back was definitely feeling it. I slapped some mortar on each brick, set it in place, and tapped it down with a trowel. Used a level to make sure everything was straight and true. I kept going, row by row, until I had a solid base. And I kept laying bricks and morter until I got the right height.
Building Up
Once the base was done, I started building up the sides. I left a few gaps in the front for the charcoal tray to slide in. On the top, I made sure to leave spaces for the grill grates to sit. I had to get a bit creative with the top layer, using some metal bars to support the bricks over the openings. And I kept building it up until the grill looked great, left it over a night.
Finishing Touches
After the mortar had dried for a couple of days, I went back and cleaned up any excess mortar with a brush. I also added a few finishing touches, like a small brick shelf on the side for holding plates and stuff. Now, I’m ready to have my family around and show off my work.
And that’s it! It took me a few weekends, some sweat, and maybe a few cuss words, but I finally got my brick grill. It’s not perfect, but it’s mine, and I’m pretty darn proud of it. Now, who’s ready for a burger?


