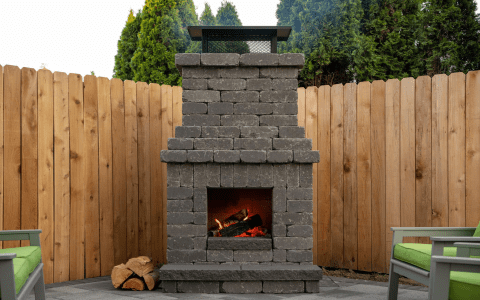
Okay, folks, let’s talk about something I did last weekend that turned out to be a real blast – I built a fire brick grill right in my backyard! I’ve always loved a good BBQ, and I figured, why not take it up a notch? Plus, there’s something just super satisfying about building stuff with your own two hands, right?
So, first off, I gathered all my materials. I hit up the local hardware store and grabbed a bunch of fire bricks – these are the ones that can handle the heat. Also, I bought some mortar mix, just the regular stuff will do. I had some tools lying around, you know, a trowel, a level, a bucket for mixing the mortar – basic stuff. I found a picture on internet, then I get a pretty good idea of what I wanted to build.


- Laying the Foundation
I started by clearing a spot in my backyard. I wanted a nice, level base, so I dug down a few inches and filled it with gravel. Then, I tamped it down real good to make sure it was solid. This part’s important because you don’t want your grill sinking or tilting later on.
- Building the Walls
Next up, I started laying the bricks. I mixed the mortar according to the instructions – it’s just like making a thick paste. Then, I started laying down the first layer of bricks on the gravel base, using the mortar to stick them together. I used the level to make sure everything was straight and even. For the first layer, I created a simple rectangle shape, leaving a gap at the front for the grill opening.
After the first layer, I just kept building up, brick by brick. I staggered the bricks, you know, like a real brick wall, to make it stronger. Between each layer, I added more mortar and checked with the level again. I kept going until the walls were about waist-high, which is a good height for grilling.
- Adding the Grill Grate Supports
Once the walls were up, I needed something to hold the grill grates. I took some extra bricks and created little ledges inside the walls, about halfway up. These would hold the grates later on. I also made a second set of ledges a bit higher up, in case I wanted to use the grill for different types of cooking.
- Letting it Cure
With everything built, I let the mortar cure for a few days. This is important because it lets the mortar harden and get strong. I covered the whole thing with a tarp to protect it from the rain and stuff.
- Firing It Up
Finally, the moment of truth! After a few days, I took off the tarp and admired my handiwork. I placed the grill grates on the ledges I built. Then, I started a small fire inside to test it out. It worked like a charm! The bricks held up great, and the heat was just right.
That evening, I invited some friends over and we had our first BBQ on my new grill. The food tasted amazing, and everyone was super impressed. Honestly, it was one of the most satisfying DIY projects I’ve ever done. If you’re thinking about building your own grill, I say go for it! It’s a ton of fun, and you end up with something really cool and useful. Plus, you get bragging rights for building it yourself!


