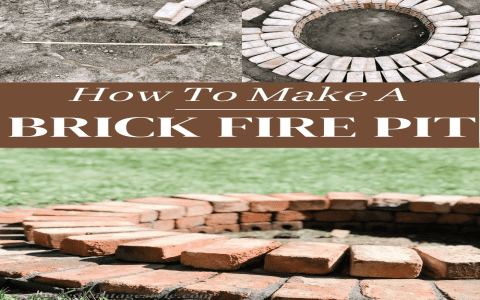
Alright, folks, gather ’round, ’cause today we’re divin’ into the world of DIY with somethin’ that’s close to my heart – a good ol’ brick barbecue grill. Now, I ain’t no professional, but I’ve been around the block a few times, and I figured it was high time I built myself a proper grill, one that’ll last longer than those flimsy metal things. And I decided I would take some photos of the progress.
Gettin’ Started
First things first, I had to figure out where this bad boy was gonna live. I’ve got this little corner in my backyard that was just beggin’ for a purpose. It’s nowhere near the house siding. That’s a big no-no if you’ve got vinyl siding – fire hazard, you know? But it’s also close enough that I ain’t gotta walk a mile to flip a burger. It’s a nice spot and I started to clean the space from weeds and other stuff.


Layin’ the Foundation
Next up, the foundation. You can’t just plop bricks on the ground and call it a day. I dug out a shallow area, maybe six inches deep, and filled it with gravel, tamped that down real good. Then, I laid some paving slabs on top. This is important – it’s gotta be level, or your grill’s gonna look like the Leaning Tower of Pisa. I spent a good chunk of time with my level, makin’ sure it was all straight and sturdy.
Stackin’ Bricks
Now for the fun part – the bricks! I picked up about a hundred of ’em from the local hardware store, nothin’ fancy, just regular ol’ red bricks. I mixed up some mortar – that’s the “glue” that holds bricks together – and started stackin’. This is where you gotta take your time. I laid down a layer of mortar, then a brick, tapped it into place, and kept goin’. Slow and steady wins the race, they say. I decided to do it 3 feet tall, more or less. I was starting to get tired.
I left some gaps between a few bricks on the bottom layer for air vents – gotta let that charcoal breathe, you see. As I got higher, I started formin’ the actual grill area, where the coal would sit. I used some metal grates I salvaged from an old grill. I just placed them over the bricks and they are removable.
The Finishin’ Touches
Once I had the basic structure done, I built a little side table, a prep table as they call it. Nothing too complex, just a simple top so I’d have a spot to place my utensils and stuff. Then, I let the whole thing cure for a few days. Mortar needs time to harden up real good, so I was sure not to rush it. Once it’s all solid, it was time to fire it up!
First Cookout
Man, that first cookout was somethin’ else. Burgers, hot dogs, even some veggies – everything tasted better comin’ off that brick grill. And the best part? I built it with my own two hands. There’s a certain satisfaction you get from buildin’ somethin’ yourself, somethin’ that’s gonna be around for years to come.
So there you have it, folks. My little DIY brick barbecue adventure. It weren’t easy, but it was definitely worth it. If you’re thinkin’ about buildin’ your own, I say go for it! Just remember to take your time, do your research, and don’t be afraid to get your hands dirty. Happy grillin’!


