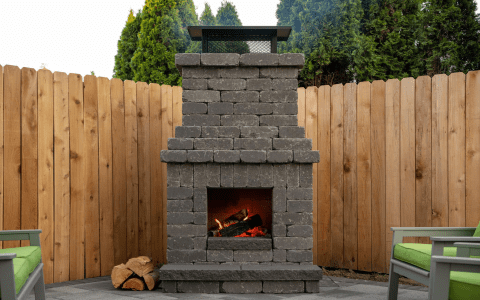
Today, I’m going to share how I made a smoker out of bricks and blocks. I saw a lot of different plans online, but I wanted something simple and cheap. It took me a weekend to put it all together, and I’m pretty happy with how it turned out.
Gathering the materials
First thing I did was to go shopping. I needed a bunch of cinder blocks and some bricks. I didn’t really count them exactly, just grabbed what looked like enough. Oh, and I picked up a metal grate too, the kind you use for grilling. I figured it’s also good to have some mortar, just in case. After loading everything up, which was a bit of a workout, I headed back home to start building.


Starting the build
I started by laying out the blocks in a rectangle shape on the ground where I wanted the smoker. I didn’t use any mortar at first, just stacked them to see how it would look. It’s like playing with giant LEGOs! After I was satisfied with the shape, I made sure it was all level, you know, so the meat wouldn’t roll off or something. Once that was sorted, I took some of the blocks off the top so I could start mortaring from the bottom.
Putting it all together
Mixing the mortar was a bit messy, but I got the hang of it. I started putting the blocks back, this time with mortar between them. I made sure to leave a small opening at the bottom for the fire. It was slow going, making sure each block was straight and sturdy. After the main structure was up, I let it sit overnight. I wanted that mortar to set real good.
Finishing touches
The next day, I added the top part where the meat would go. I used bricks for this because they were smaller and easier to work with. I placed the metal grate inside, resting on some bricks I jutted out. This would hold the meat above the fire. For the lid, I just used a large, flat piece of metal I found in my garage. It wasn’t pretty, but it did the job.
The first smoke
Finally, it was time to test it out. I started a small fire at the bottom, put some chicken on the grate, and closed the lid. I wasn’t sure what to expect, but after a few hours, I checked on it. The chicken looked amazing, all smoky and delicious. It tasted even better than it looked! I was so proud of my DIY smoker. It wasn’t perfect, but it worked like a charm.
Building this smoker was a fun project. It was a bit of work, especially carrying all those blocks, but totally worth it. Now I can smoke my own meat whenever I want, and it’s way cheaper than buying one of those fancy smokers. If you’re thinking about it, just go for it. It’s a great way to spend a weekend, and you get to enjoy the fruits of your labor in the most delicious way possible!


