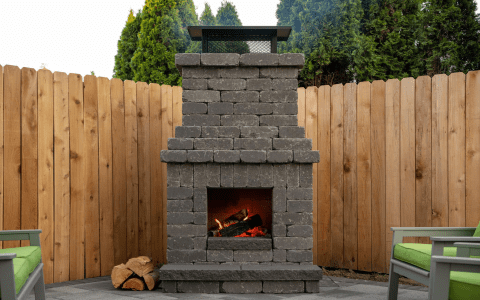
Okay, so, I’ve always wanted a nice spot in my backyard to grill, right? I figured, why not try building a brick barbecue grill myself? I mean, how hard could it be? Turns out, it’s a pretty fun project, and I wanna share how I did it, step-by-step. This is my fourth time building one, and I made it special with a large firepit and a smoker on the side.
Planning and Gathering Stuff
First thing I did was draw up a rough plan. Nothing fancy, just a sketch to get an idea of what I wanted. I decided on a size that would fit nicely in my yard and also accommodate a decent-sized grill set. After measuring stuff out, I figured I’d need about 100 to 120 bricks. Oh, and not just any bricks – I used regular ones for the outside, but got some firebricks for the inside where the fire goes. Those firebricks can handle the heat, you know?


Laying the Foundation
Next up, I marked out the area where the grill was gonna go. I dug a shallow pit, filled it with some gravel, and then poured a concrete slab. This was to make sure the grill had a solid base. I let that concrete set for a couple of days, just to be sure it was rock solid. Patience is key, folks.
Building the Walls
Once the base was ready, I started laying the bricks. I mixed up some mortar – that’s the stuff that holds the bricks together – and got to work. I laid the first row of bricks on the concrete, making sure they were level. Then, it was just a matter of stacking them up, row by row. I used a level to make sure each row was straight. I also staggered the bricks, like you see on a regular wall, so it’s stronger. Between each row, I put about 10mm of mortar. Most people build these things about 10 to 12 bricks high, and that’s what I aimed for, too.
Adding the Grill and Smoker
As I was building up the walls, I left some spaces to put in the grill grates later. I also built a separate section on the right for the smoker. This part was a bit trickier, but I managed. I basically made a smaller box with a door, connected to the main firepit. For the inside of the grill and smoker, I lined it with those firebricks I mentioned. They’re denser and hold heat better.
Finishing Touches
After getting the walls to the height I wanted, I let the mortar dry for a few days. Then, I put in the grill grates. I also added a little chimney to the smoker to help with the airflow. And that was pretty much it! I cleaned up the whole thing, let it all cure for a bit, and then it was ready for a test run.
First Cookout
Finally, the moment of truth – the first cookout! I loaded up the firepit with charcoal, lit it up, and waited for it to get to the right temperature. I threw on some burgers and sausages, and they cooked up perfectly. The smoker worked great, too. I smoked some ribs low and slow, and they came out amazing. So tender and flavorful.
All in all, building this brick barbecue grill was a blast. It took some time and effort, but it was totally worth it. Now I’ve got a killer setup for grilling and smoking in my backyard. Plus, it’s kinda cool to say I built it myself, you know? If you’re thinking about doing something like this, I say go for it! It’s a fun project, and you’ll love the results.


