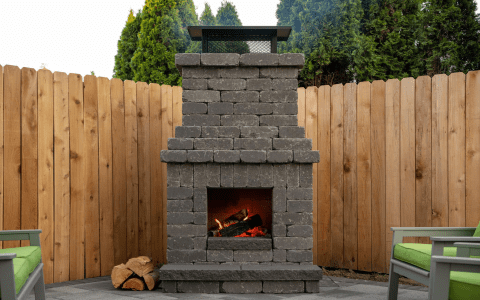
Okay, so, I finally did it. I built my own brick BBQ in the backyard, and let me tell you, it was quite the experience. I’ve always wanted a nice BBQ setup, and buying one of those fancy pre-made ones? Forget about it, way too expensive. Plus, where’s the fun in that?
Planning and Gathering
First things first, I had to figure out where to put this thing. I paced around my backyard a few times, picturing where it would look best and where it would be most functional. I ended up choosing a spot near my patio, makes sense, right? Keep the food close to where you’ll be eating it.


Then came the fun part – gathering supplies. I’m no expert, but I did a ton of reading online and watched some videos. I made a list of everything I needed: bricks, obviously, mortar, a trowel, a spirit level, some string, and a few other bits and pieces. I hit up my local home improvement store, and let me just say, pushing a cart full of bricks is a workout in itself!
Laying the Foundation
Building a solid foundation was crucial. I dug out a shallow area where the BBQ would sit and filled it with some gravel for drainage. Then, I mixed up some mortar – it’s like making a really thick, sandy cement – and started laying the first course of bricks. I used the string and the spirit level to make sure everything was nice and straight and level. This part was pretty time-consuming, but I took my time. No rushing here!
Slow and steady, this is the key to getting a good foundation.
Building the Walls
Once the foundation was set, I started building up the walls. This was actually kind of fun. Stacking bricks, one by one, spreading the mortar, tapping them into place. It’s a bit like playing with giant, heavy LEGOs. I made sure to stagger the bricks for strength, and I kept checking with the level to make sure everything was still straight. I wanted a U-shape structure for my BBQ.
Adding the Finishing Touches
After the main structure was built, I needed to think about the cooking surface. I decided to use a metal grill that I got from a local hardware store. I placed it on top of the brick structure. I also wanted a little side shelf for prepping food, so I built a small extension on one side.
Finally, I let the whole thing cure for a few days. You don’t want to rush this part, otherwise, the mortar won’t set properly. Then after three days, I also added a gas grill burner into the BBQ for cooking, it is the central source of heat. It’s typically constructed of stainless steel.
- Made a plan
- Bought all the stuff I needed
- Built the bottom part
- Made the walls
- Let it dry real good
- Added a gas grill burner
The First Cookout
Once everything was dry and ready, it was time for the inaugural cookout! I invited some friends over, fired up the grill, and cooked up a feast. Burgers, hot dogs, the whole nine yards. And let me tell you, the food tasted amazing! Maybe it was the satisfaction of cooking on something I built myself, or maybe it was just the magic of outdoor cooking, but it was a great time.
So, there you have it. My DIY brick BBQ adventure. It was a lot of work, but it was totally worth it. Now I have a custom-built BBQ that’s perfect for my backyard, and I saved a bunch of money in the process. Plus, I’ve got the bragging rights to say I built it myself! If you’re thinking about tackling a project like this, I say go for it! Just be prepared to put in some sweat equity and have a lot of fun along the way.


