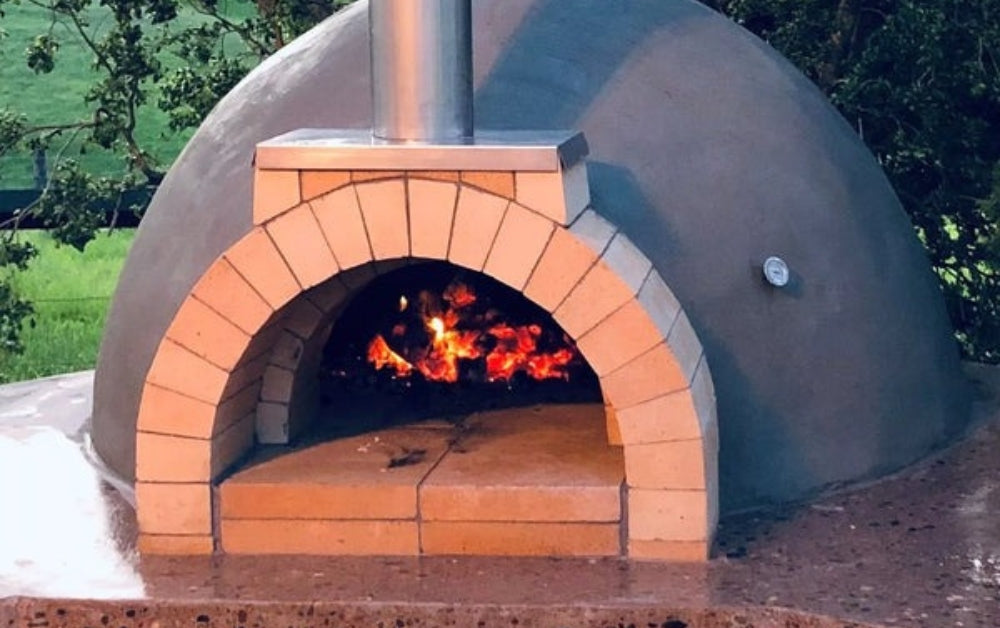
Okay, so I’ve always wanted one of those cool brick pizza ovens in my backyard. You know, the kind that makes you feel like a real Italian pizzaiolo? Well, I finally decided to just go for it. I mean, how hard could it be, right?
Getting Started
First things first, I needed to gather all the stuff I would need. This meant a trip to the home improvement store. I grabbed a ton of bricks – the fire-resistant kind, of course. Also picked up some mortar, sand, and a few other bits and bobs that the guy at the store said were essential. Oh, and I made sure to get some good gloves because I didn’t want to mess up my hands.


The Foundation
Now, I’m no expert builder, but I figured the first thing any good structure needs is a solid foundation. So I dug a big hole in my backyard – let me tell you, that was a workout! Then, I mixed up a bunch of concrete and poured it into the hole. I made sure it was nice and level, using one of those spirit level things. I let that set for a couple of days, just to be sure it was rock solid.
Building the Base
With the foundation all set, I started building up the base for the oven. This was basically a big square box made of bricks and mortar. It took a while, and I had to keep checking that everything was straight and level. It wasn’t perfect, but hey, it was sturdy. This thing was going to hold the weight of the oven, so it had to be strong.
The Dome
Here’s where things got tricky – building the dome. I had watched a few videos online, so I had a rough idea of what to do. I built a form out of sand, which was kind of like a mold for the inside of the oven. Then, I started laying bricks around it, slowly working my way up. It was like putting together a 3D puzzle, but with heavy bricks and messy mortar. I had to take my time and make sure each brick was secure.
The Chimney and Door
After I finished the dome, which felt like a major achievement, I added a chimney. I mean, you need somewhere for the smoke to go, right? I also created an opening for the oven door. I fashioned a simple door out of some scrap metal I had lying around. It wasn’t pretty, but it did the job.
Firing It Up
Once everything was built, I had to let the mortar dry completely. This took about a week, and let me tell you, the waiting was the hardest part. Finally, the day came to fire it up. I built a small fire inside and slowly increased the temperature over a few hours. This was to cure the oven and make sure it wouldn’t crack under high heat.
Pizza Time!
Finally, the moment of truth – pizza time! I prepped my pizza, slid it into the oven, and waited. It cooked so fast! And the taste? Absolutely amazing. There’s just something special about a pizza cooked in a wood-fired oven. It had that perfect crispy crust and smoky flavor.
Reflections
Looking back, building that pizza oven was a lot of work. It was messy, tiring, and at times, pretty frustrating. But, it was also incredibly rewarding. Every time I use it, I get this sense of accomplishment. Plus, my friends and family love it. We’ve had some great pizza parties already.
Would I do it again? Probably. It’s not for everyone, but if you like a good challenge and enjoy working with your hands, it’s definitely worth considering. Just be prepared for a bit of hard work and a lot of fun along the way. And trust me, that first homemade pizza makes it all worthwhile!


