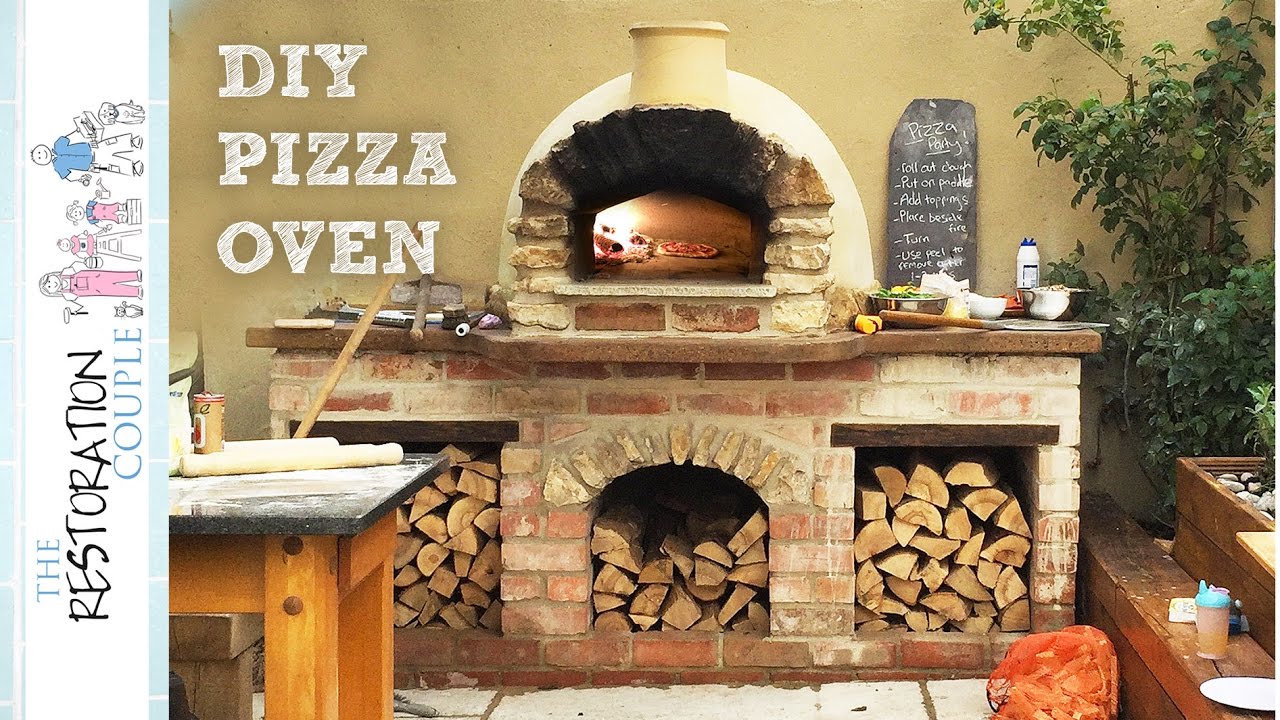
Okay, so, I’ve always wanted one of those cool wood-fired pizza ovens. You know, the kind that makes those amazing, crispy pizzas? Well, I finally decided to just go for it and build one myself. It seemed like a huge project at first, but honestly, it wasn’t as bad as I thought it would be.
Getting Started
First things first, I needed a spot for this thing. I cleared out a corner of my backyard, and started digging. My god, so much digging, I had a pad for some concrete first. I used some wood planks to build a form for the concrete pad. I think they were 2x10s. Mine was around eight feet long. I mixed up a bunch of concrete – and let me tell you, that stuff is heavy! Poured it into the form, smoothed it out, and then just had to wait for it to dry. That was the easy part, but let it dry. Then I decided to stack some bricks into something that at least looked like a pizza oven. I figured, if I put in a ton of time and spent money on fancy stuff to finish it off, I might end up not saving anything compared to just buying one.


Building the Base
Next up, I built a simple base out of cinder blocks. I got these rectangular blocks and just stacked them up, making sure they were level. I’m no bricklayer, so this was a bit of a learning curve. I did some research to help me out. I used mortar to hold them together – it’s like a cement glue, but you have to mix it just right, otherwise it’s a pain to work with. The base ended up being about waist-high, which seemed like a good height for cooking.
The Oven Dome
Now for the fun part – the actual oven dome. I used regular red bricks for this. I found out that you need a lot of bricks. Like, a LOT. This is where it started to get tricky. I built a form out of sand to shape the inside of the oven. Then I started laying bricks around it, again with the mortar. The first few layers were pretty straightforward, but as the dome started to curve inwards, I had to cut some bricks to make them fit. I used an angle grinder for this, which was kind of fun, but also a bit scary, don’t get distracted or it can quickly become not fun.
The Chimney and Door
Once the dome was done, I built a little chimney at the front. This was just a small rectangular structure made of more bricks. I also left an opening for the oven door. I didn’t have a door yet, but I figured I could just use a piece of metal or something to cover it while cooking.
Letting it Cure
With the main structure done, I had to let the whole thing cure for a while. This means just letting it sit there so the mortar can fully harden. It took a couple of weeks, and during that time, I removed the sand form from inside the oven. I also started thinking about how to finish it off. I considered adding some tiles or something, but in the end, I decided to keep it simple. It looks pretty rustic as is, and honestly, I was tired of working on it!
Firing it Up
Finally, the day came to try it out! I built a small fire inside the oven using some kindling and small pieces of wood. The smell of the wood burning was amazing, it was like I should have been doing this the entire time. It took a while for the oven to heat up, but once it did, I slid in my first pizza. And guess what? It was awesome! The crust was perfectly crispy, and the toppings were all bubbly and delicious. It was way better than any pizza I’d ever made in my regular oven. It felt so good to be eating something I made in something I built myself.
So, there you have it. That’s how I built my own wood-fired brick pizza oven. It was a lot of work, but it was totally worth it. Now I can have amazing pizza whenever I want, and I have a cool story to tell about how I built the oven myself. It’s not perfect but I’m proud of it. If you’re thinking about doing something like this, I say go for it! Just be prepared to get your hands dirty and to learn a lot along the way. I hope you enjoyed my journey.


