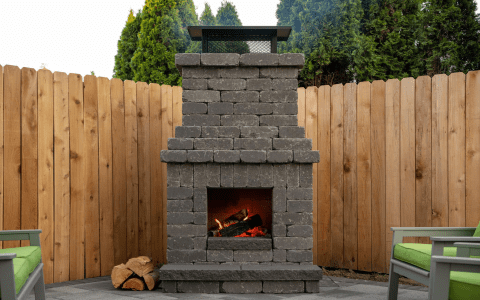
Hey folks, today I’m gonna show you how I built a smoker out of bricks. I’ve been wanting to do this for a while, and I finally got around to it. Let me tell you, it was a bit of a project, but totally worth it in the end.
First off, I started by gathering all my materials. I decided to go with regular old bricks cause they’re cheap and easy to find. I picked up a bunch of them from the local hardware store, along with some mortar mix and some other bits and bobs. I had to make a couple of trips cause I didn’t think I needed as many bricks as I did, but I got there in the end.


Planning
Before I started stacking bricks, I did a little bit of planning. I sketched out a rough design on some paper, figuring out the dimensions and how I wanted the smoker to look. I measured everything out a few times, just to be sure. I didn’t want to get halfway through and realize I’d made a mistake. Once I had a solid plan, I started laying the foundation.
Laying the Foundation
I started by digging a shallow trench in my backyard, where I wanted the smoker to be. Then, I laid down a layer of gravel for drainage, followed by a layer of sand to level everything out. Once that was done, I started laying the first course of bricks. I used a trowel to spread the mortar, and I made sure each brick was level and plumb before moving on to the next one. The first few layers were a bit tricky, but once I got the hang of it, it started to go a bit smoother.
Building the Walls
Once the foundation was set, I started building up the walls. I staggered the bricks, like you’re supposed to, to give the structure more strength. I worked my way up, layer by layer, checking the level and plumb regularly. It took a while, and my back was definitely feeling it by the end of the day, but I kept at it. I left an opening at the bottom for the firebox, and another one higher up for the smoke chamber door.
Firebox and Smoke Chamber
For the firebox, I just continued the brickwork, creating a separate compartment at the bottom. I lined the inside with firebricks for extra insulation. For the smoke chamber, I used some metal grates that I found at the scrap yard. I cut them to size and welded them together to create a box shape. Then, I built up the brickwork around it, leaving the top open for now. I also added a couple of metal rods across the inside of the smoke chamber to hang the meat from.
Finishing Touches
Once the main structure was done, I started on the finishing touches. I built a small chimney out of bricks on top of the smoke chamber to help with the airflow. I also made a door for the smoke chamber out of some scrap metal and hinges. I sealed any gaps with some high-temperature sealant to prevent smoke from escaping. Finally, I added a thermometer to the smoke chamber door so I could monitor the temperature inside.
After a few days of hard work, my brick smoker was finally finished! I let the mortar cure for a week or so before firing it up for the first time. I started with a small fire to season the smoker, and then I gradually increased the temperature. The first time I used it, I smoked some ribs, and they turned out amazing! They were juicy, tender, and had that perfect smoky flavor.
Building a brick smoker was definitely a challenge, but it was also a lot of fun. I learned a lot along the way, and I’m really proud of how it turned out. Now I can enjoy delicious, homemade smoked meat whenever I want. If you’re thinking about building your own smoker, I say go for it! It’s a rewarding project, and you’ll be the envy of all your friends and neighbors. Just be prepared for some hard work, and don’t forget to take breaks when you need them. Happy smoking!


