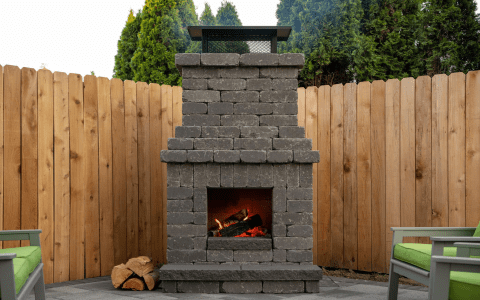
Okay, here we go. I’ve always wanted a brick smoker pit in my backyard, you know, for those lazy Sunday afternoons, smoking some ribs or a brisket. Last summer, I finally decided to take the plunge and build one myself. Let me tell you, it was quite the adventure!
First, I did some research. I mean, I watched a bunch of videos online and read a few articles. I found that using fire bricks is crucial because regular bricks can’t handle the heat and will just crumble over time. It’s not about “too much” heat, it is about the consistent heat. You know what I mean? Fire bricks hold the heat and make it easier to keep the temperature steady.


After I got a good idea of what I was doing, I made a list of all the materials I needed. I’m talking fire bricks, regular bricks, some concrete, and a metal grate for the cooking surface. Oh, and of course, charcoal and wood chips for that smoky flavor!
- Fire bricks
- Regular bricks
- Concrete
- Metal grate
- Charcoal
- Wood chips
I had to decide what type of bricks I should use. Any type of brick is okay for the structure but fire bricks are a must for the inside. They are way denser than other bricks so they can hold the heat better.
Building a built-in BBQ grill is not easy, and the price varies depending on the materials, size, and additional stuff. I mean, if you want to get fancy, you are going to spend more money. My simple little grill costs me around $500 to build.
The next step was drawing up a plan. I sketched out a simple rectangular design. Nothing fancy, just a basic pit with a space for the fire and a separate area for the meat. I figured a simple design would be easier for a first-timer like me.
With my plan and materials in hand, I started building. I dug a shallow pit in my backyard and laid a concrete foundation. Then came the bricklaying. It was slow going, but I took my time, making sure each brick was level and secure. I built the walls of the pit, leaving an opening at the front for access and adding in some space for the wire mesh. I think it is better to keep the wood chips and charcoal above the wire mesh.
Once the structure was up, I added the metal grate on top. This is where the meat would sit and cook. I also made a makeshift lid out of some spare metal sheets to help trap the heat and smoke.
Now came the moment of truth – the first cook. I lit up a pile of charcoal and added some hickory wood chips. I placed a rack of ribs on the grate, put the lid on, and let it smoke. I kept the vents wide open to allow airflow. It took a while, but let me tell you, those ribs were the best I’ve ever had! Tender, smoky, and full of flavor. It was so worth all the effort.
Building my own brick smoker pit was a rewarding experience. It was tough work, but I learned a lot, and now I have a great spot to cook up some delicious barbecue. If you’re thinking about building one yourself, I say go for it! Just do your research, make a plan, and take your time. Happy smoking!


