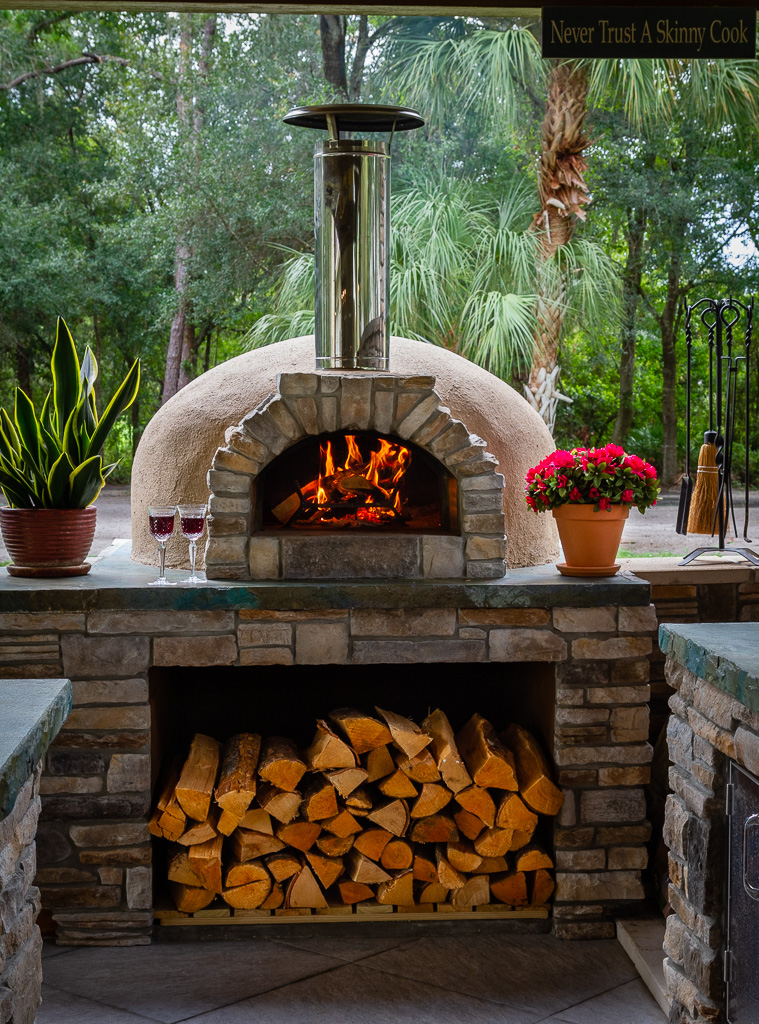
Alright, folks, gather ’round, because today we’re diving into something pretty darn cool – building your very own brick pizza oven. Now, I’ve always been a sucker for a good homemade pizza, and let me tell you, nothing beats the taste of a pie cooked in a wood-fired oven. So, I rolled up my sleeves and decided to build one myself. I gonna tell you everything.
Getting Started
First things first, I had to figure out where this bad boy was going to live. I had a nice little spot in my backyard that seemed perfect. I started by digging and prepping the area where the oven’s base would sit. I made sure to level it out real good – you don’t want a wonky pizza oven, trust me.


Laying the Foundation
Next up, building a form for the concrete. This is what’s gonna hold your oven up, so it’s gotta be sturdy. I used some plywood and two-by-fours to create a square frame. Once that was set, I mixed up a batch of concrete and poured it into the form, making sure to smooth it out on top. Then came the waiting game – concrete takes time to cure.
Building the Dome
Now, for the fun part – building the actual oven. There are a bunch of ways to do this. I decided to go with the exercise ball method. Yeah, you heard that right. I got myself a big ol’ exercise ball and used it as a mold for the dome shape. I started laying firebricks around the base, using refractory mortar to stick ’em together. This mortar can handle some serious heat.
- Firebricks: These are your best friends. They can take the heat and keep your oven cooking for a long time.
- Mortar: Gotta use refractory mortar. It’s made for high temps and won’t crumble under pressure.
- Insulation: I wrapped the dome with a ceramic fiber blanket to keep the heat in. It’s worth it.
Layer by Layer
Slowly but surely, I worked my way up, laying bricks around the exercise ball, creating that classic dome shape. It took some patience, but seeing it come together was pretty awesome. Once I got to the top, I carefully removed the exercise ball – and voila, a dome was born!
The Finishing Touches
Almost there! I built a little opening at the front for the oven door. If you want, you can get a steel door and frame, but I just used some extra firebricks to create a makeshift door. To make it look nicer, I covered the outside with some extra bricks. It’s not just about function; it’s gotta look good too, right?
Firing It Up
After letting everything dry and set, it was time for the moment of truth. I built a small fire inside the oven and let it burn for a while to cure the mortar and dry out any moisture. Then, I cranked up the heat and tossed in my first pizza. The smell of that wood-fired pizza cooking was incredible.
And there you have it! That’s how I built my very own brick pizza oven. It was a heck of a project, but totally worth it. Now, I can enjoy delicious, homemade, wood-fired pizzas anytime I want. If you’re thinking about doing this yourself, go for it! It’s a great feeling, building something with your own two hands and then using it to make something so tasty. Just remember to take your time, do your research, and enjoy the process. Happy building, folks! And trust me, if you make it, using tiles or other design features would be better, but the cost will mount up quickly. Think about it.


