Hey everyone, it’s your boy back again with another DIY project that I tackled over the weekend. This time, I decided to roll up my sleeves and build a brick grill in my backyard. Yeah, you heard that right, a good old-fashioned brick grill! Thought I’d share my little adventure with you all, from start to finish.
First off, I needed a plan. I’m no architect, but I figured, how hard could it be? I spent a good chunk of my Friday night sketching out some designs. I wanted something classic, you know? Something that says, “This guy knows his way around a grill.” I looked at a bunch of ideas online for some inspiration.


Saturday morning, it was go-time. I headed out to the local hardware store and picked up the supplies. I opted for about 120 bricks, some of those classic red ones because, why not? They look sturdy and reliable. It felt like the right amount, I didn’t want the thing towering over my fence. I also grabbed a standard grill set and a tray for the coals. I decided on one grill since I don’t need anything too fancy, it is enough for me.
Next up, the foundation. This was crucial, had to make sure the grill wouldn’t just sink into the ground after a few uses. I marked out the area and dug a shallow pit, then laid down a bed of concrete. Paving slabs would have worked, too, but I didn’t have any on hand. I let that set for a couple of hours while I sorted out the bricks and organized my workspace.
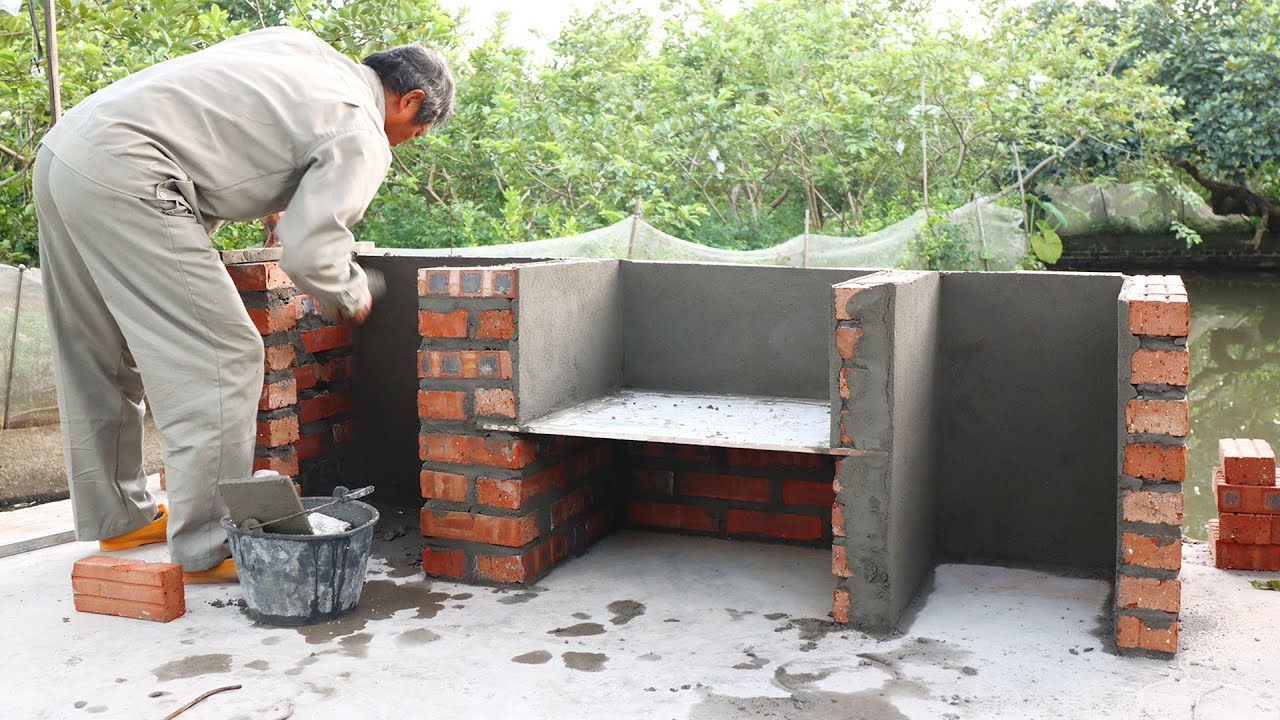
Building the walls was the fun part. I started laying the bricks, row by row, using mortar to keep them in place. It was like playing with adult LEGOs. I made sure to stagger the bricks for extra strength, and every few rows, I’d check if everything was level. Didn’t want a Leaning Tower of Pisa situation, right?
As the walls grew taller, I left spaces for the coal tray and the grill. I used some metal brackets I found in my garage to support the grill, making sure they were securely embedded in the mortar. It was pretty straightforward, and honestly, I was feeling like a pro.
By Sunday afternoon, the main structure was up. I added a little side table to the design, because who doesn’t need a spot to place their barbecue tools and marinades? I think this part is very useful, because you don’t want to put your tools everywhere, right? It was a simple extension of the base, and it really added to the overall look.
- Planning is key. I mean I get this is basic, but really, having a solid plan makes everything smoother.
- Take your time. Rushing through it will only lead to mistakes. I made sure to let the mortar set properly between layers.
- Safety first. I placed the grill about 10 feet away from anything that could catch fire. I have a lot of plants, I need to keep them safe. Better safe than sorry, especially when dealing with fire!
- It’s a workout. Lifting bricks and mixing mortar is no joke. My back was definitely feeling it by the end of the weekend. I need to do some exercise I guess.
Here’s what I learned:
I let the whole thing cure for a few days before firing it up for the first time. And let me tell you, that first barbecue was glorious. The burgers tasted better, the sausages were juicier, and the whole experience just felt…authentic.
So there you have it, my brick grill project. It wasn’t just about the end product, but the whole process of creating something with my own two hands. If you’ve got a weekend to spare and you’re itching for a project, I highly recommend giving this a shot. It’s a fun little project, and you will have a great time building it up. Plus, who can say no to homemade grilled food? Happy grilling, everyone!


