Okay, so I’ve always wanted a proper barbecue setup in my backyard, you know, the kind you see in movies where the dad’s the king of the grill? Well, I finally decided to take the plunge and build one myself. I went with a brick barbecue because it just looks so classic and sturdy. Plus, I figured it’d be a fun project. Here is the log of my process.
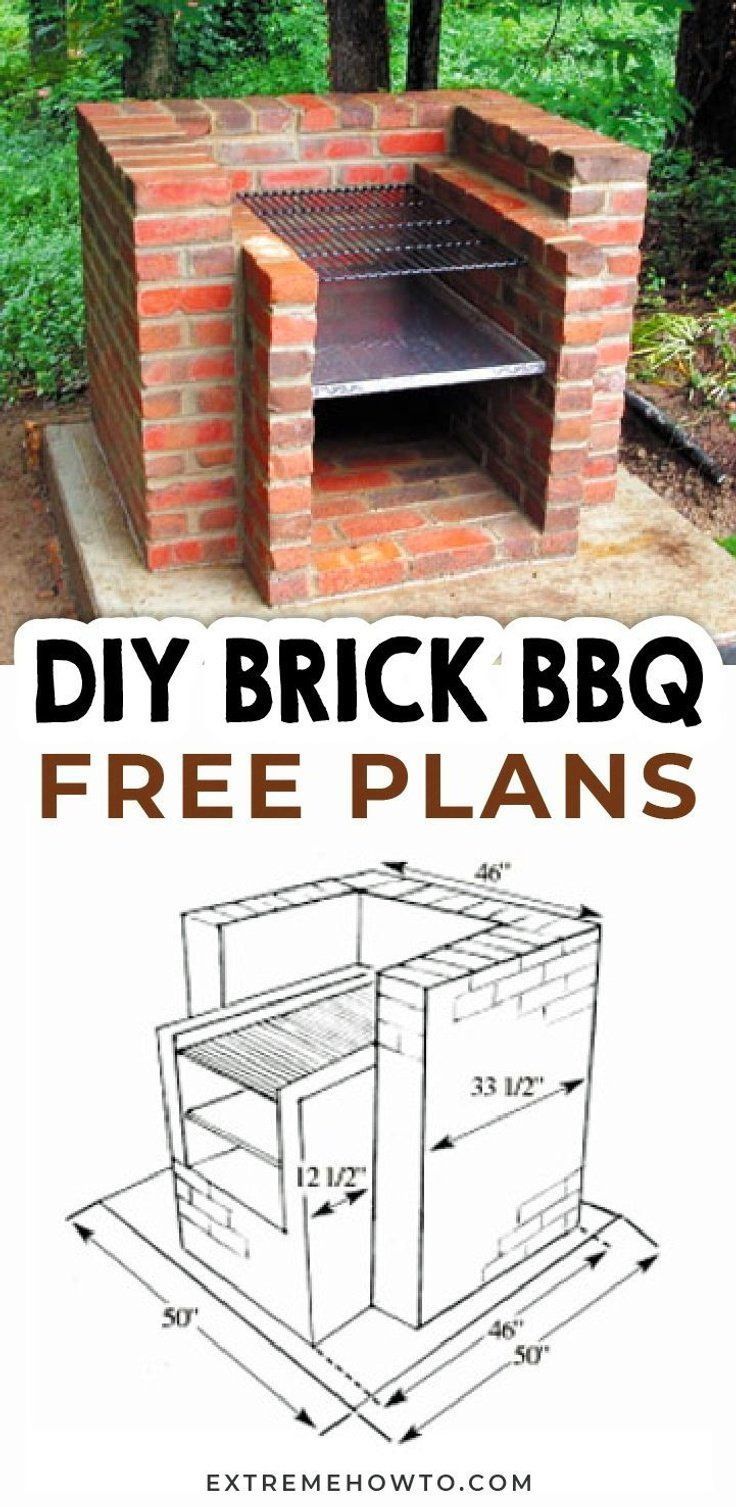
First, I did some research online, and you know how it is, information is scattered everywhere, but it generally gave me a good idea. Then, I spent days looking at different designs online. I wasn’t looking for anything too fancy, just a simple, functional brick barbecue. I finally settled on a basic design I liked.


Next, I had to gather my materials. I made a list: bricks, obviously, mortar, a grill grate, and some metal parts for the frame. I ended up getting these regular bricks for the structure. Then, I visited different hardware stores and compared the prices. And I also needed firebricks for the inside because they can handle the heat better.
With the materials ready, I started building. Now, I’m no expert mason, but I’ve done some small bricklaying projects before. I started by laying out the base, making sure it was level. This was crucial, otherwise, the whole thing could be unstable. Once the base was set, I started building up the walls, one row of bricks at a time. It was slow going, and I had to keep checking that the walls were straight and level. I used a leveler and a string line for this, and let me tell you, it was a lifesaver.
After the walls were up, I installed the metal frame for the grill grate. This was a bit tricky because I had to make sure it was securely anchored to the brickwork. I used some metal brackets and screws I found at the hardware store, and they seemed to do the job. Once the frame was in, I placed the grill grate on top. It fit perfectly, which was a huge relief.
The final step was to build the firebox. This is where the firebricks came in. I lined the inside of the barbecue with them, making sure to leave some space for airflow. This part was pretty straightforward, just like laying regular bricks, but it felt more important because it’s where all the heat would be.
I let the whole thing dry for a couple of days, just to make sure the mortar was completely set. Then, I fired it up for the first time. I was a little nervous, but everything held together perfectly. The heat was distributed evenly, and the bricks did a great job of retaining the heat.
Cost Breakdown
- Bricks: About $80. I needed quite a few, but they weren’t too expensive.
- Firebricks: Around $50. These were a bit pricier than the regular bricks, but worth it for the firebox.
- Mortar: $20 for a few bags. I didn’t need a whole lot, just enough to hold the bricks together.
- Grill grate and metal frame: Roughly $70. This was probably the most expensive part, but it’s essential for the actual grilling.
- Miscellaneous: Another $30 for things like screws, brackets, and a few tools I didn’t already have.
All in all, the whole project cost me around $250. Not bad for a custom-built brick barbecue, right? And I had so much fun doing the DIY project! It took me about a week to complete, working on it in my spare time. It wasn’t easy, but it was definitely rewarding. Now, I have a solid, good-looking barbecue in my backyard, and I can’t wait to use it all summer long. Plus, I can proudly say I built it myself!
If you’re thinking about building your own brick barbecue, I say go for it! Just do your research, take your time, and don’t be afraid to ask for help if you need it. It’s a great project, and you’ll end up with something you can enjoy for years to come.


