Alright, folks, gather ’round! I’ve got a story for you about my latest backyard adventure – building a brick BBQ pit. Now, I’m no professional builder, but I do love a good DIY project, and what’s better than a homemade BBQ pit for those summer cookouts, right?
So, I started this whole thing with a simple idea: I wanted a sturdy, reliable place to grill up some goodness. I did a bit of research, you know, just browsing around to see what’s what. I found out that you can actually use regular bricks for this, but here’s the kicker – you gotta use a mortar that can handle the heat. Not just any regular mortar. I found this stuff called high heat resistant mortar, which seemed perfect for the job.


Now, about the cost, I was pleasantly surprised. I picked up some grill pans from a local store, nothing too fancy, and they were pretty affordable. With that and the bricks, mortar, and a few other bits and bobs, the whole project didn’t even break the bank. I mean, we’re talking about a custom BBQ pit for a fraction of what those fancy store-bought ones cost!
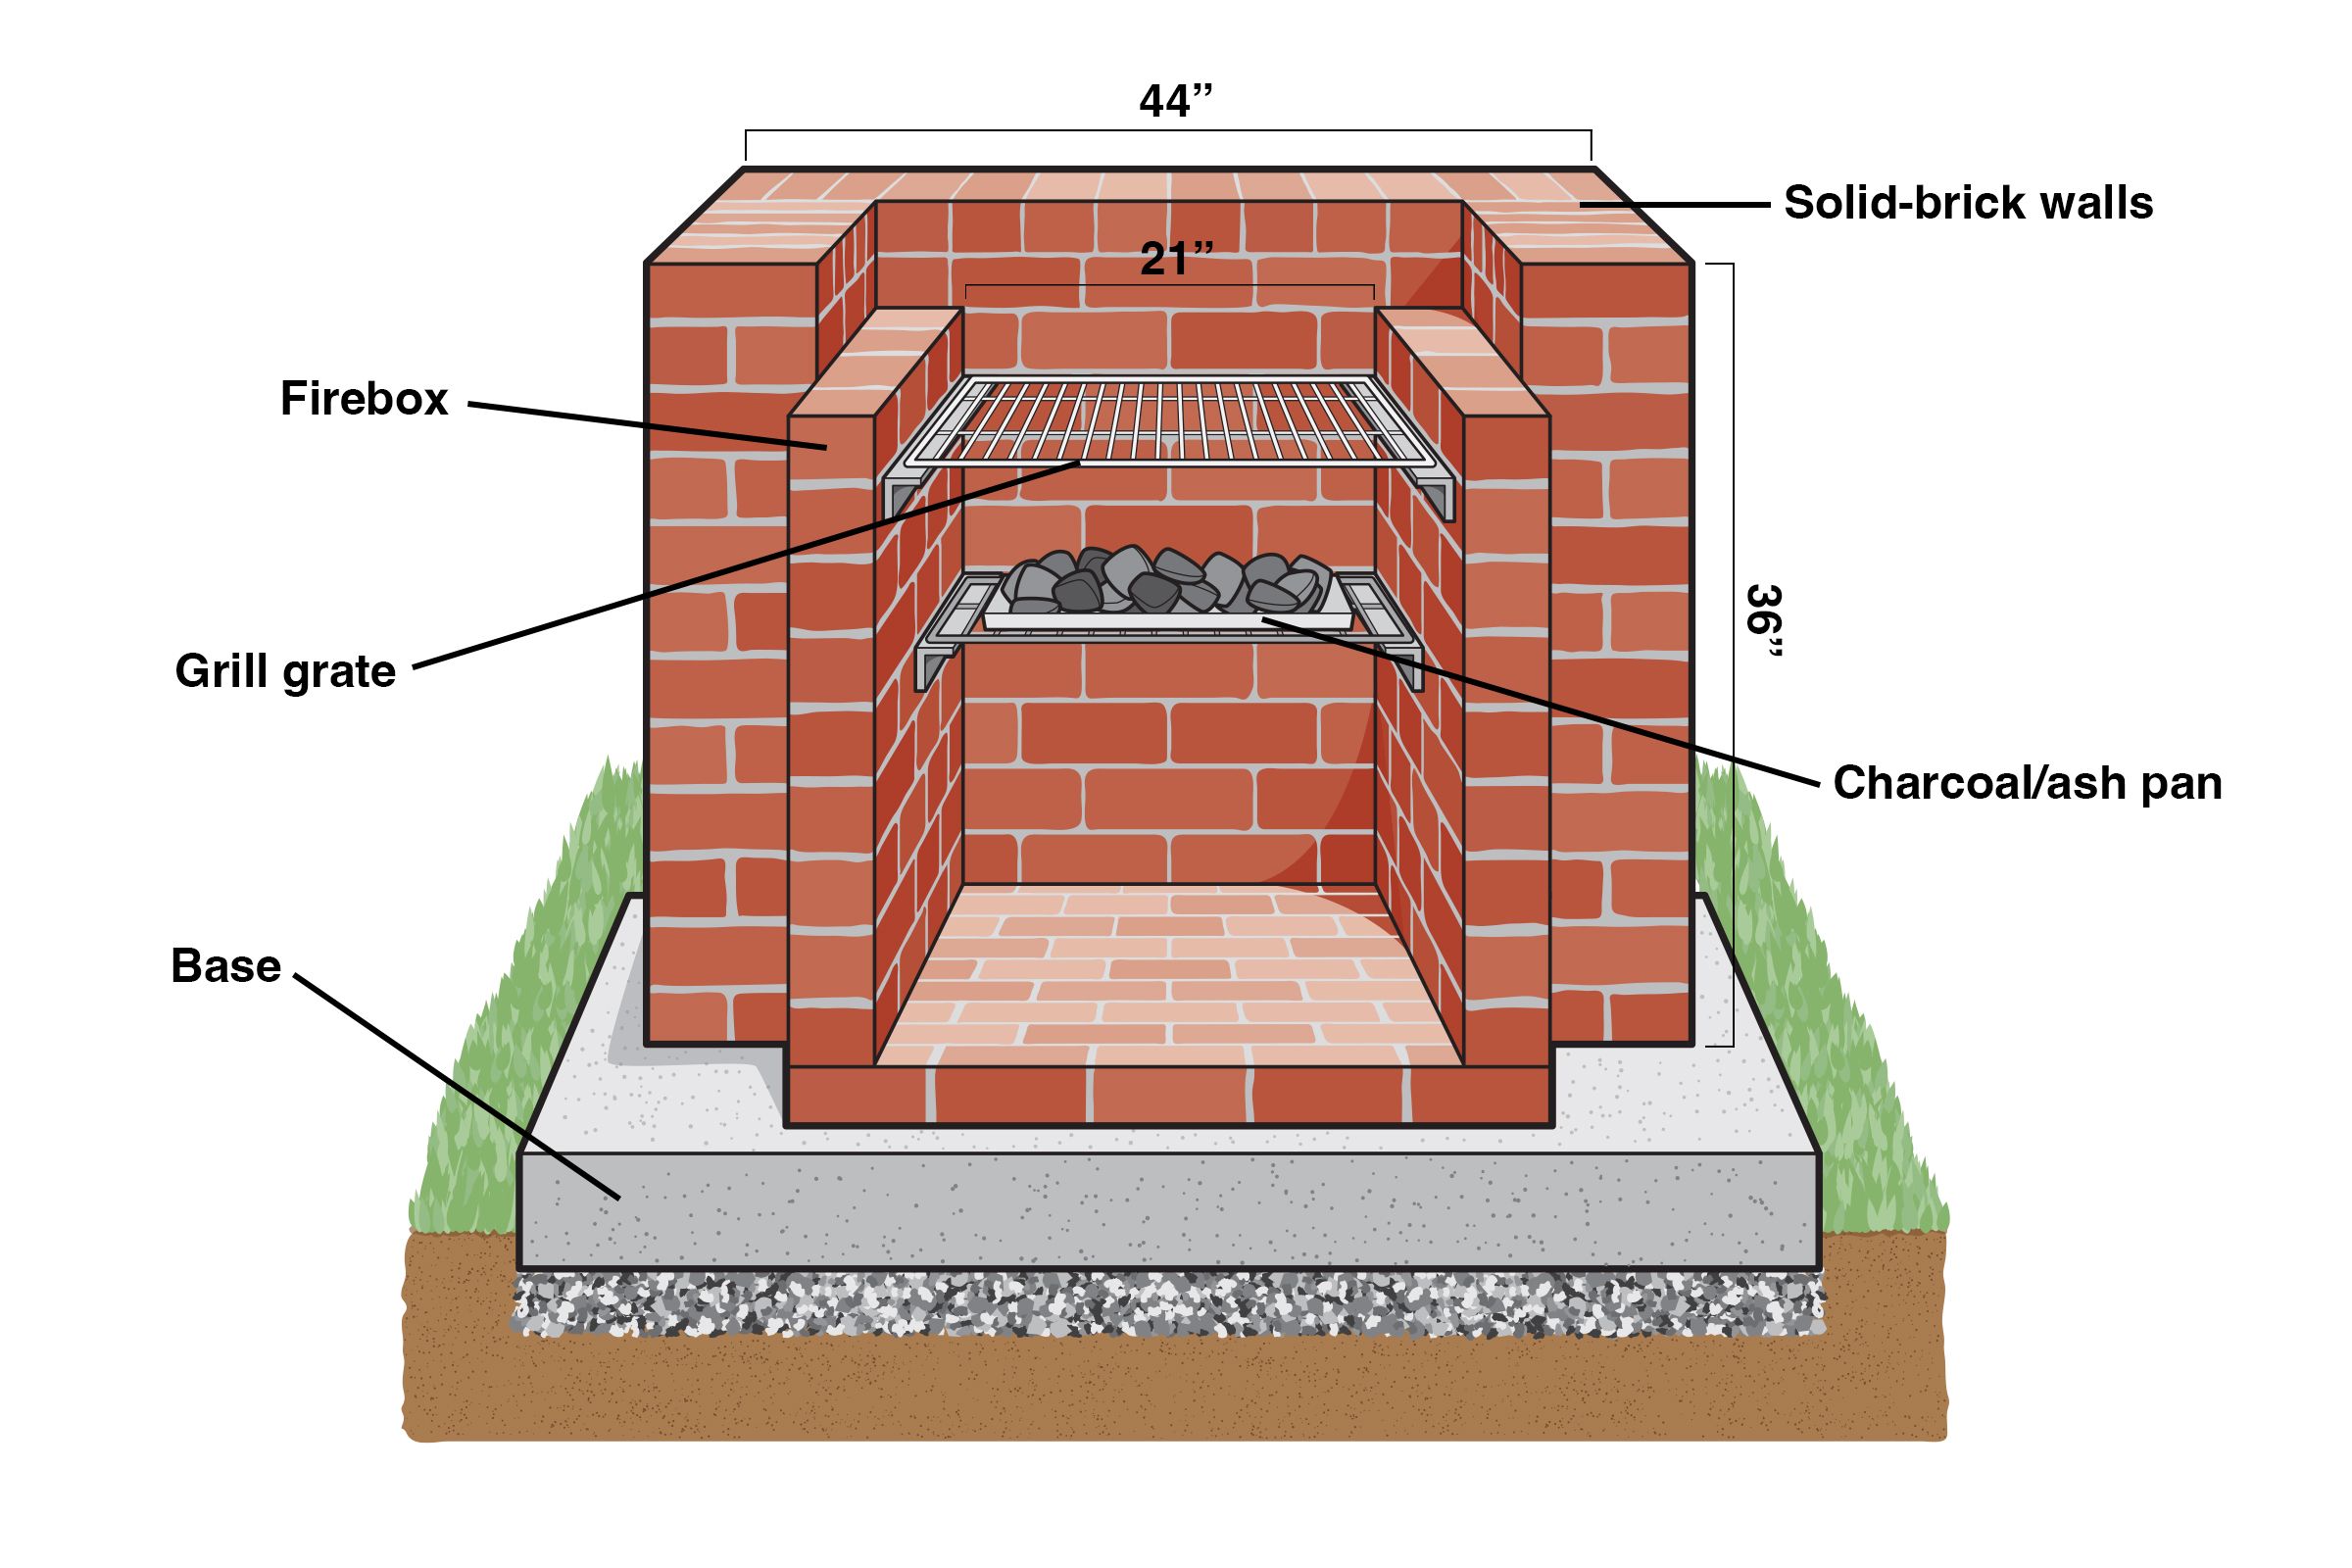
Next up, I had to figure out how much of everything I needed. I had this grill set, about 700mm x 400mm, which I used as a guide to plan out the size of the pit. I did some rough sketches, measured it out, and then it was time to get to work.
Getting My Hands Dirty
First things first, I laid out the foundation. I dug a shallow trench and filled it with some concrete mix. This was going to be the base of my pit, so I made sure it was level and solid. Once the concrete set, I started laying the bricks. I’m not gonna lie; it was a bit of a learning curve. Getting those bricks lined up and level took some patience, but hey, that’s part of the fun, right?
- Laying the first brick: That first brick was a big deal, like laying down the law of the land.
- Building up the walls: Slowly but surely, I built up the walls, one brick at a time. I used that special high-heat mortar I mentioned earlier, making sure each brick was snug and secure.
- Adding some metal parts: Then I put in some metal parts. I used metal grates at the bottom of my pit, cause I saw some folks online using them.
- Taking breaks: Building a BBQ pit is no small feat, you know? There were times I had to step back, take a break, and just admire my handiwork. And of course, I had to document the whole process. I took loads of pictures – gotta show off the progress, right?
After a few days of hard work (and a few cold ones to keep me going), it finally came together. I added a metal grate for the bottom of the pit – something I’d seen others do – and made sure there was enough space for air to circulate. The last step was letting the mortar cure properly. This took a little while, but it was crucial for making sure the whole thing was solid and heat-resistant.
And there you have it! My very own, handmade brick BBQ pit. It’s not perfect, but it’s got character, and it’s all mine. I’ve already had a few cookouts, and let me tell you, the food tastes amazing. There’s just something about cooking on a grill you built yourself. It’s like, every burger and every hot dog is a little celebration of your own hard work. So, if you’re thinking about doing something similar, I say go for it! It’s a rewarding project, and you end up with a killer spot to grill. Just remember to take your time, enjoy the process, and don’t be afraid to get your hands a little dirty!


