Well, now, talkin’ ‘bout makin’ yourself a brick smoker right in the backyard, that ain’t no fancy job. All you need’s some bricks, a spot in the yard, and a bit of muscle. No need for no special skills, no big ol’ budget—just a few things to get started.
1. What Kinda Bricks to Use


First off, not just any ol’ brick will do, no, sir. You want them fire bricks for the inside where the heat’ll be the hottest. Other bricks, they’ll start crumblin’ from the heat, get all weak and brittle-like. Fire bricks, though, they’re made for heat—they’re tougher and thicker, so they hold on to heat longer, keepin’ that smoker hot but steady. You’ll need these for where the fire’s gonna burn, trust me on that.
2. Pickin’ a Spot in the Yard
Once you got them bricks, find a good spot out back—somewhere safe and open, away from the house, trees, or anything that might catch fire. A brick smoker, it’s solid, but it still gets hot! You gotta have room to build without worryin’ ‘bout settin’ somethin’ ablaze.
3. Start Stackin’
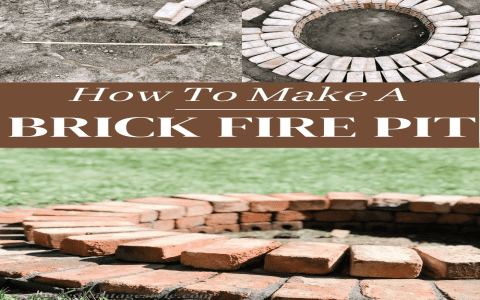
Now, if you’re thinkin’ this is some complicated process, it ain’t. Just start stackin’ them bricks up, layer by layer. You can use cinder blocks on the outside to make it cheaper and then line the inside with those fire bricks. Stackin’ ’em in rows makes it sturdy and gives you a little control over how tall or wide you want that smoker. Bigger if you’re feedin’ a crowd, smaller if it’s just for family use.
4. Building the Fire Chamber
Now comes the important part: the fire chamber. This is where you’ll put the wood or charcoal. For a good, smoky flavor, get some hardwoods like oak or hickory—those’ll give that nice smokey taste everyone loves. Make sure to leave an openin’ for the door and maybe a little vent up top so the air can circulate good. That’s what keeps the heat goin’ and lets the smoke get all up in the meat.
5. Cleanin’ and Preppin’ the Smoker


Once you get it built, you’ll wanna give it a good clean. Wash it down with warm water and maybe some degreaser. Get all the dust and dirt off. Then take a wire brush, give it a good scrubbin’, especially if there’s any rust or rough spots. Rinse it off good and let it air dry a bit ‘fore you start cookin’. Ain’t no one wantin’ to taste dirt on their barbecue!
6. Prepping for First Use
First time you fire it up, you’ll want to do a “seasoning” run. That’s where you light a small fire, let it burn for a few hours with the lid closed. This helps get rid of any funny tastes from buildin’ materials, makes sure the smoker’s ready to cook food.
7. Cookin’ with Indirect Heat
Here’s the trick to good smokin’—indirect heat. You don’t just throw meat right over the flames. Nope, put your meat off to the side, away from the fire. That way, the smoke can swirl around slow-like, seepin’ into every inch of that meat. This low-and-slow method’s what makes meat tender and juicy, with that rich, smoky flavor you can’t get from a regular grill. Takes patience, but let me tell ya, it’s worth every minute.
8. Regular Upkeep
Now, don’t forget to clean it up after each use. Get a brush, scrape out any ashes and grease build-up. Keeps the smoker workin’ longer, plus keeps your food tastin’ better without any burnt leftovers from last time. And every now and then, check them bricks and mortar, make sure none are crackin’ or loosening. Fixin’ any cracks early keeps that heat in and makes sure the smoker lasts a good long while.
So there ya go—ain’t no need for a big ol’ metal smoker from the store. With just some bricks, a good spot in the yard, and a little elbow grease, you’ll have a smoker that’ll last ya years. Whether it’s for a family cookout or just a slow weekend dinner, buildin’ your own brick smoker’s a good way to get yourself some tasty barbecue without breakin’ the bank.


Tags:[brick smoker, DIY smoker, fire brick smoker, BBQ smoker design, backyard smoker, homemade smoker, indirect heat cooking, smoker maintenance]


