So, I’ve been wanting to up my barbecue game, and what better way to do that than to have a proper smoker, right? I decided to take the plunge and build one myself, out of bricks no less. It’s gonna be a permanent fixture in my backyard, and I gotta say, the thought of all the delicious, smoky goodness I’m gonna cook up is getting me all fired up!
First things first, I gotta figure out the size. It needs to be just right, you know? Not too big that it takes up half the yard, but not too small that I can only smoke a couple of ribs at a time. After a few sketches and some serious thinking on the toilet, I landed on the perfect dimensions. I decided that would be a vertical smoker that I could not only smoke with, but also grill or just enjoy a fire in. Now, I’m no engineer, but I can follow instructions. I did a bunch of research, watched a ton of videos, and read through countless forum posts. Some folks online recommended using fire bricks for the inside since they can handle super high temperatures, but they’re kinda pricey. Regular bricks can handle the heat just fine for a smoker since it’s a lower temperature. It’s more about having bricks that are clean, not too porous, and don’t absorb a lot of water. I found a local supplier who had just what I needed, and it didn’t break the bank.


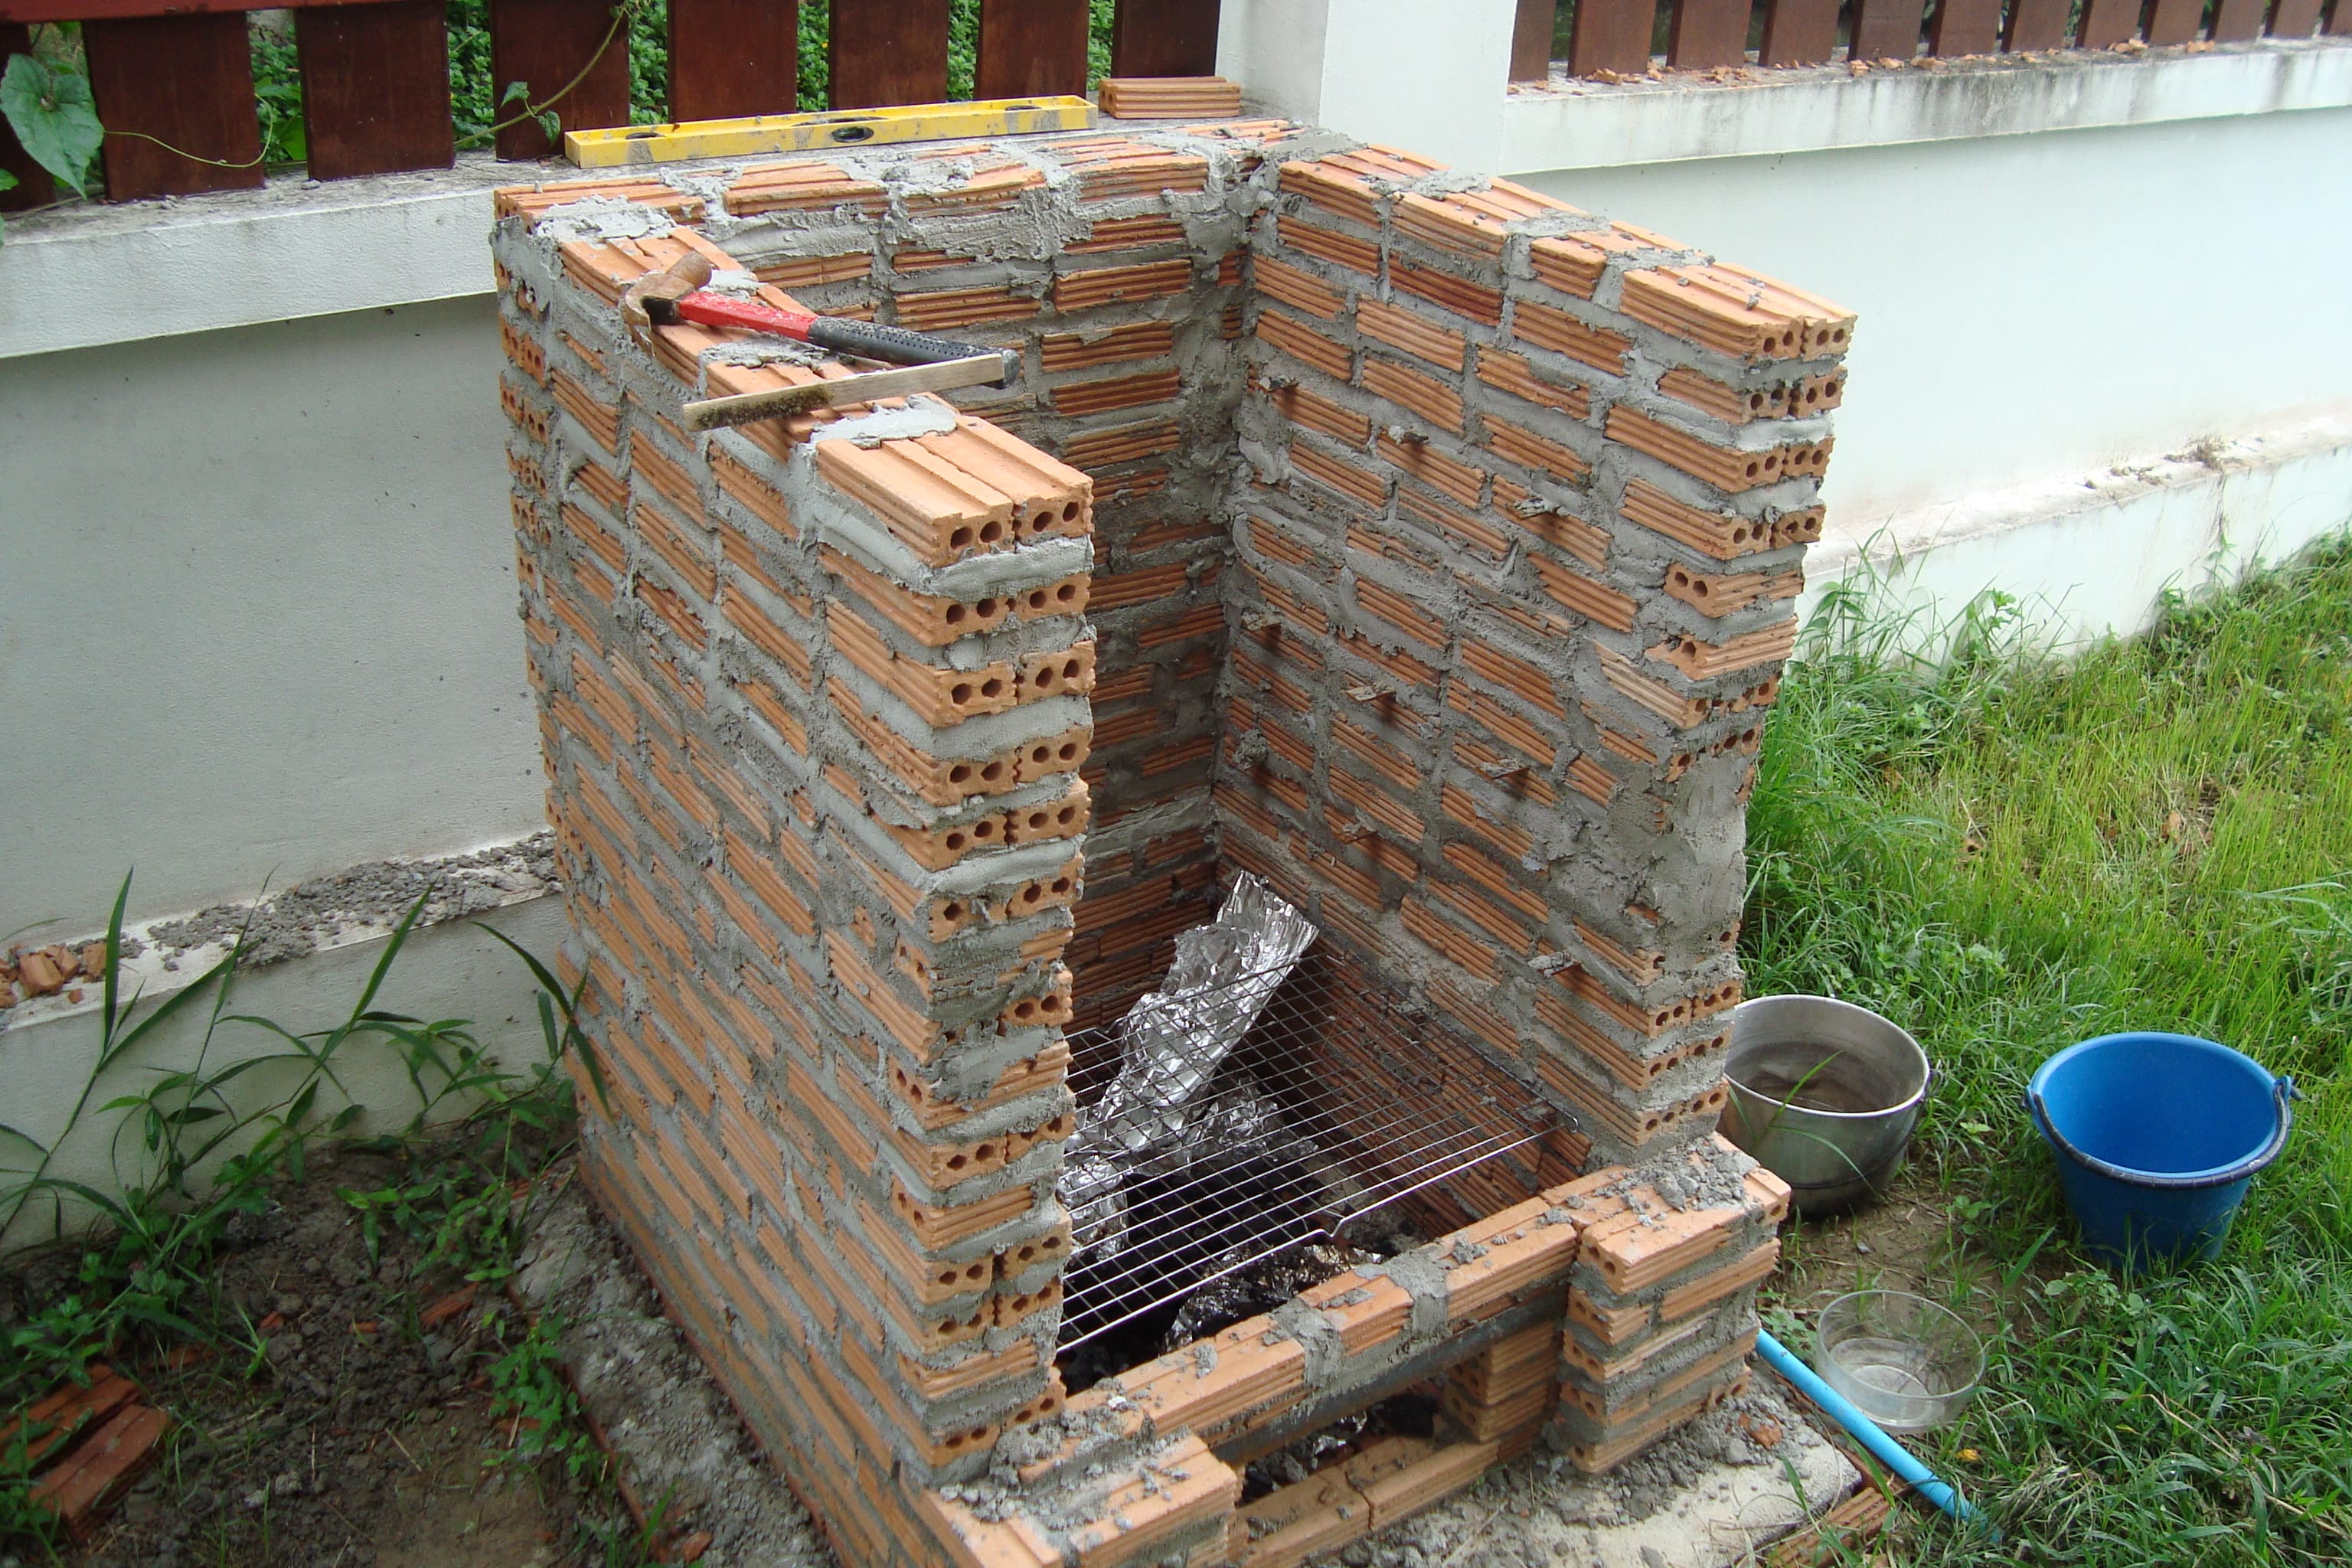
Next up, actually building this thing. The base was pretty straightforward, just a simple concrete foundation. The fun really starts when I got to laying those bricks. Let me tell you, it’s not as easy as it looks in those time-lapse videos. There’s a certain art to getting the mortar just right and making sure everything is level and even. But I took my time, double-checked my measurements constantly, and before I knew it, the walls started to take shape.
- Laying the Foundation: Poured a solid concrete slab for stability. Made sure it was level.
- Building the Firebox: Started with the firebox, which is where the coals and wood will go. I used regular bricks and lined the bottom with a single layer of fire bricks, just to make myself feel better.
- Constructing the Cooking Chamber: This is where the magic happens. I built the walls up, leaving space for the door and a hole on top where I would later install a metal sheet and thermometer.
- Adding the Door: I got a heavy-duty metal door from a scrap yard and attached it with some serious hinges. I had to make sure it had a tight seal to keep that precious smoke in.
- Installing the Chimney: On top, I added a hole with a metal sheet I could slide over it to control the airflow and temperature. I also bought an analog thermometer to keep track of the cooking temperature.
After a few weekends of hard work, some sore muscles, and a few minor mishaps, my brick smoker was finally standing tall and proud in my backyard. The first time I fired it up, I was like a kid on Christmas morning. I threw in some hickory wood, tossed on a rack of ribs, and just watched that beautiful smoke billow out. The smell was incredible, and let me tell you, the taste was even better. I’ve since smoked everything from brisket to salmon to even mac and cheese, and it all comes out amazing.
This brick smoker has become my pride and joy. It’s not just about the food, though that’s a huge part of it. It’s about the process, the craftsmanship, and the satisfaction of building something with my own two hands. Every time I fire it up, I’m reminded of the journey it took to get here, and that makes the food taste even sweeter.


