Alright, so a while back I got it into my head that I really wanted to get into smoking meats. I’ve always loved a good BBQ, and the thought of making it myself, just the way I like it? That sounded amazing. But those fancy smokers you see in stores? Way out of my budget. So, I figured, why not build my own? I decided to go with a brick smoker because, hey, bricks are cheap, and I kinda liked the rustic look it would give my backyard.
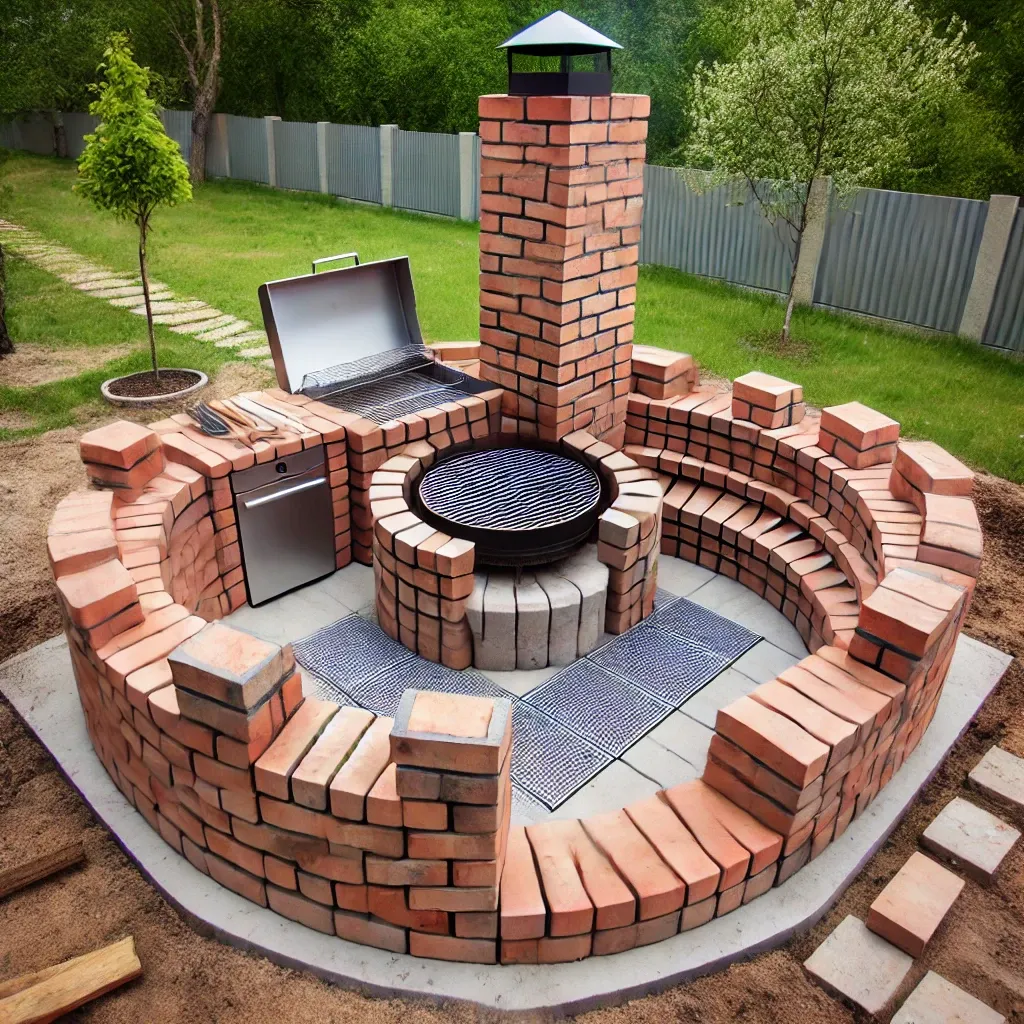
First things first, I had to figure out what I was doing. I spent hours online, looking at pictures, reading forums, and watching videos. There’s a ton of info out there, which is both good and bad. Good because you can find an answer to almost any question, but bad because it can get overwhelming fast. Eventually, I settled on a simple design – basically a big brick box with a firebox on one side and a chimney on the other.


Next up was gathering the materials. I hit up a local building supply store for the bricks, and let me tell you, those things are heavy! I ended up making several trips because my little car could only handle so much weight. I also picked up some mortar, a metal door for the firebox, and a few grates for the cooking chamber. Tools-wise, I already had a trowel and a level, which are pretty much all you need for basic bricklaying.
Now came the fun part – putting it all together. I started by laying a concrete foundation. To do this, I dug a shallow pit, filled it with gravel for drainage, and then poured in the concrete. Once that was set, I started laying the bricks. I’d never really done any brickwork before, so this was a learning experience. I’d spread some mortar, plop a brick down, tap it into place with the trowel, and then check it with the level. It was slow going at first, but I got the hang of it after a while.
Building the walls was pretty straightforward. I just kept stacking bricks, making sure to stagger the joints for strength. I left an opening on one side for the firebox door and built a small archway to connect the firebox to the main cooking chamber. It took me a couple of weekends, working on and off, but eventually, I had a solid brick structure standing in my backyard. I even added a chimney stack.
The last step was to season the smoker. I built a small fire in the firebox and let it burn for a few hours, gradually increasing the temperature. This helps to cure the mortar and get rid of any moisture in the bricks. I also rubbed down the inside of the cooking chamber with some cooking oil to create a non-stick surface. During this step, I played around with the temperature. Once it reached my desired temperature, I closed the bottom vent until the temperature began to drop, then slightly opened it to stabilize it.
Finally, the moment of truth – the first smoke! I picked up some ribs, seasoned them with my favorite rub, and got the fire going. I kept a close eye on the temperature, adjusting the vents as needed to maintain a steady heat. After several hours, the ribs were done, and they were amazing! The smoke flavor was perfect, and the meat was tender and juicy.
Maintenance Tips
I realized that I’ve got to keep this thing clean if I want it to last. I let everything cool down, then I scrape out any leftover ash and give the grates a good scrub. If there is a lot of grease, I use a degreaser. Keeping it clean should prevent rust and corrosion. And every once in a while, I check the mortar for cracks and patch them up if needed.
- Regular Cleaning: After each use, I make sure to clean out the ashes and any food residue.
- Deep Clean: Every few months, I give it a thorough cleaning with a degreaser to prevent grease buildup.
- Inspect for Damage: I regularly check for cracks in the bricks or mortar and fix them promptly.
- Protect from Moisture: When I’m not using the smoker for a long time, I make sure to clear out any grease to prevent mold from growing.
Building my own brick smoker was a lot of work, but it was totally worth it. I learned a ton, saved a bunch of money, and now I have a custom smoker that makes some of the best BBQ I’ve ever tasted. Plus, it’s a great conversation starter whenever I have people over. If you’re thinking about building your own smoker, I say go for it! Just be prepared to put in some elbow grease and get your hands dirty. You won’t regret it!


