Well now, if you ever wanted to build yourself a homemade brick smoker, I reckon I can help ya out a bit with some good ol’ advice. You see, it ain’t that hard, but ya gotta have the right tools and a bit of patience. So, let’s get down to it, and I’ll tell ya just how to go about it without too much fuss.
First off, ya gotta know one thing: fire bricks are the key. You can’t just use any old brick. Nope, regular bricks can’t stand up to the heat. They’ll crack and fall apart before ya know it. Fire bricks, on the other hand, they’re made to handle the heat, so don’t skip on them. You can get ’em at most hardware stores, and trust me, they’ll save ya a lot of trouble in the long run.


Now, for the building part, well, there’s different ways to go about it. Some folks like to use cinder blocks—you just stack ‘em up like a good ol’ wall, and that’ll get ya a basic smoker right quick. But if you want something a little fancier, you might wanna go with the full brick smoker, which will last ya a lot longer and give ya a nice cooking space.
Step 1: Getting the Materials
- Fire bricks – about 50 to 75 of ‘em, depending on how big ya want the smoker.
- Cinder blocks (optional for the base).
- Concrete mix (if ya go for the cinder block style).
- Rebar or metal rods to help hold things together (especially if you use a big firebox).
- A propane burner or electric hotplate if ya plan on doing hot or cold smoking (now, ya don’t gotta have both, but one or the other helps).
Once ya got all that, we can get to building. Now, I ain’t saying this is an easy job, but with a little elbow grease and a few tools, you’ll be cooking up some good meat in no time.
Step 2: Laying the Foundation
Start by laying down your cinder blocks if you’re using ‘em. Make sure they’re all level and nice and sturdy. That’s gonna be the base of your smoker, so it’s gotta be strong. You don’t want no wobbly smoker, no sir.
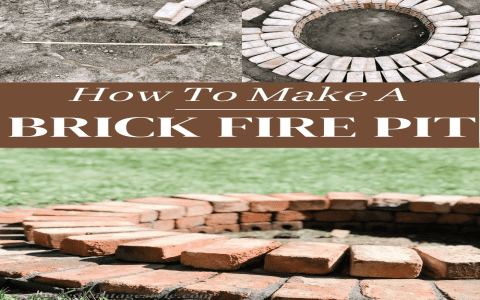
If you’re using just the bricks, ya don’t need cinder blocks—just start laying your fire bricks in a square or rectangular shape, depending on how big you want it. Build it up layer by layer, using a little mortar to hold the bricks together. But don’t go too quick—make sure each layer is level before adding the next one. You don’t want no crooked smoker, trust me.
Step 3: Building the Firebox
Now, the firebox is where the magic happens. That’s where you’ll put the wood or the propane burner if you’re using one. You can make it as big or as small as you want, but remember, the bigger the firebox, the more heat you can make. But don’t make it so big that your smoker ends up too hot or hard to manage. It’s all about balance, like making a good stew.


When you’re building your firebox, make sure the bricks are tightly stacked. You don’t want air gaps in there. Air gaps can cause the smoke to escape and mess up your smoking process. Keep it tight, and be sure to leave a little space for ventilation, too. If ya use propane, you’ll need to make sure there’s room for your burner to fit comfortably.
Step 4: The Smoking Chamber
Next, we get to the part where the meat goes. This is the smoking chamber. It should be above the firebox, where all the heat and smoke will rise. You can make this part as high or low as you like, but I’d say aim for around 4 to 5 feet tall. That way, the smoke has plenty of room to travel and surround the meat.
Make sure to leave a hole at the top for the smoke to escape. That’s important, otherwise, it’ll get too smoky inside, and that’s no good for the meat. The more smoke, the better flavor, but too much smoke can make it bitter. Balance, remember?
Step 5: Finishing Touches
Once ya got everything built up, it’s time to add a door, a chimney (if ya feel fancy), and maybe some shelves inside for your meat. You can make the door out of metal, or just use bricks for a simple opening. If you want a chimney, just put a pipe or a small metal chimney on top to help the smoke flow out. This’ll also keep the smoke from blowing back into your face while you’re working.
Ya might also want to add some insulation around the smoker to keep the heat in. You can do this with some thick cement or fire-resistant material. Just be sure not to block up the holes that let the smoke out, ‘cause that’s no good.
Step 6: Get to Smoking!


Once it’s all built, it’s time to fire it up. If you’re using propane, hook it up and get it going. If you’re using wood, start a nice fire in the firebox. You want a good, steady heat, not too hot, and not too cold. Let the smoker warm up for about an hour before you put your meat in, so everything’s nice and even.
Now, for the fun part—put your meat in there, close the door, and let it smoke. Check on it every so often, but don’t keep opening the door or you’ll let all the smoke out. And remember, it might take a few hours, depending on what kind of meat ya got in there. Fish, jerky, pork, beef… all take different times, but in the end, you’ll have yourself some mighty fine smoked meat.
Final Thoughts
Well, there ya go. Ain’t too hard, is it? Just a bit of patience and the right materials, and you’ll be smoking meat like a pro in no time. So go ahead, gather your bricks, find yourself a good spot to build, and get started. You’ll be the talk of the neighborhood with your homemade brick smoker!
Tags:[brick smoker, homemade smoker, fire bricks, cinder blocks, DIY smoker, smoking meat, BBQ smoker, propane smoker, homemade BBQ, brick smoker design]


